This guide covers Starter Plan and Plus Plan.
Jump to: Starter Plan · Plus Plan
This guide walks you through the full setup for Magical Fees. You'll install the app, create fee rules, and configure your online store so fees display correctly from product page to checkout. Use the jump links above to skip to plan-specific sections.
What the Starter Plan Covers
Starter gives you fixed and percentage fees on products and order subtotal, location-based rules, credit card surcharges, and support for both the online store and POS. Customer tag fees are included on Everywhere fees. You don't get order-total fees, PayPal fees, customer tag fees on Function fees, or the Checkout UI Extension — those are Plus-only. The Starter + Compliance upgrade adds unlimited Audit Log history (instead of 60 days).
What the Plus Plan Adds
Beyond Starter, Plus gives you:
- Order Total fees — Apply fees to the order total (after discounts, shipping, tax) instead of just subtotal.
- PayPal fees — Add payment-method fees for PayPal transactions.
- Customer Tag fees on Function fees — Apply Function fees only to customers with specific tags (for example wholesale, tax-exempt, or B2B). Customer tag fees on Everywhere fees are available on every plan.
- Checkout UI Extension — Fees appear natively in Shopify's checkout with full Shop Pay support.
- Block method + discounts — Use the Block method so product-based discounts apply to your fees.
- Audit Log — 60-day searchable history of fee applications (unlimited on compliance add-ons). See How to use the Magical Fees Audit Log.
Install the App
- Install Magical Fees from the Shopify App Store.
- Confirm your subscription. There's a 14-day trial so you can test before committing.
After installing, you'll land on the Magical Fees home page. Until you add a fee it reads Welcome. Add your first fee and shows the most popular fee templates.
Create Your First Fee
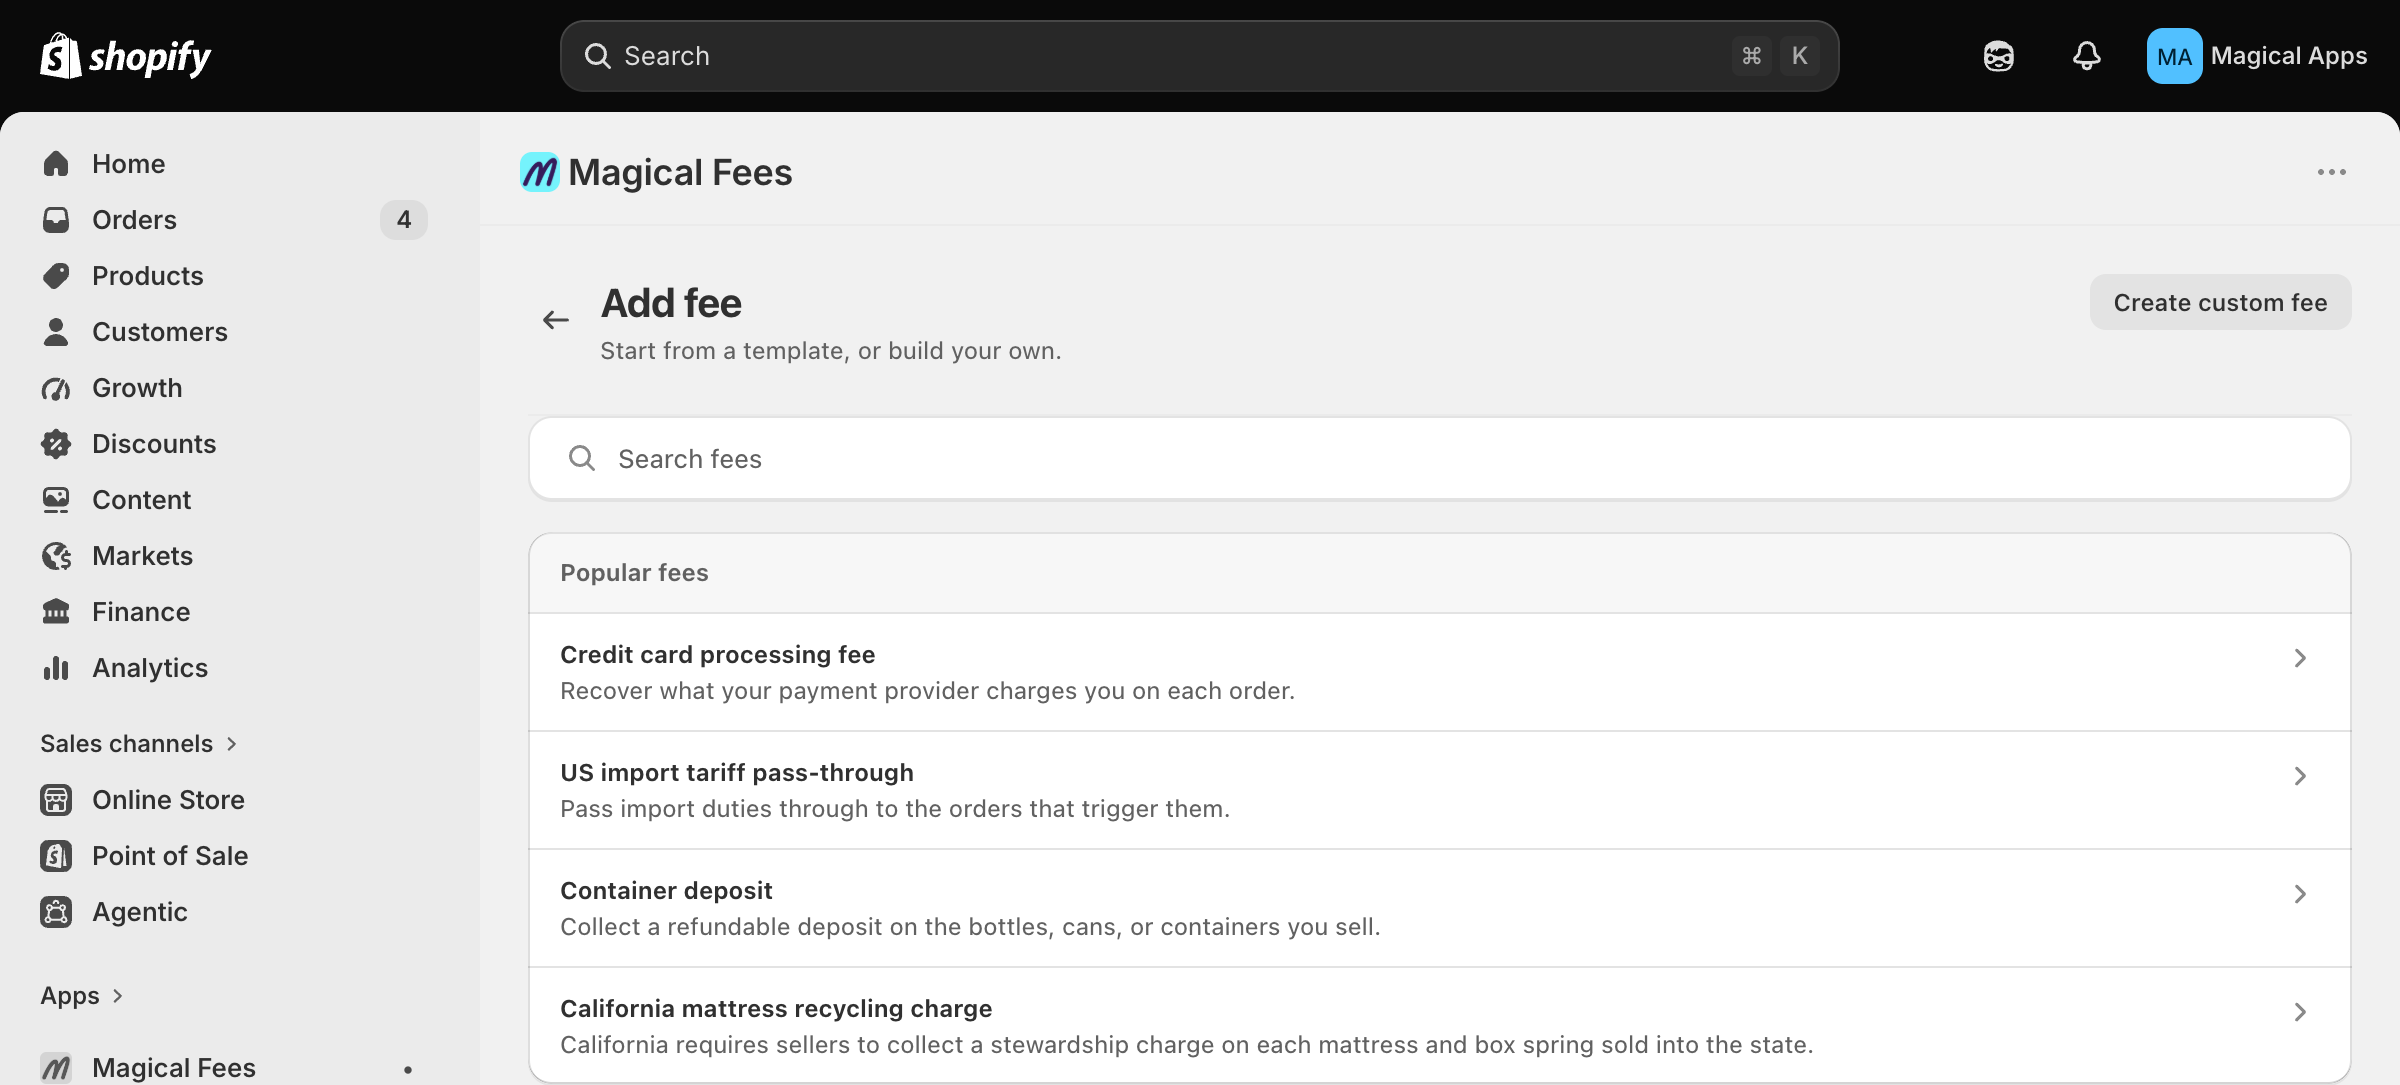
- Click Add fee. The catalog opens with Popular fees at the top and every template grouped by fee type.
-
Fastest path: pick a template. Container deposits, mattress recycling, battery fees, tariffs, and card surcharges come with the statutory amount, receipt title, tax setting, and conditions filled in. Open the template, confirm which of your products it covers (a collection, or for deposits the pack-size option values), and click Activate fee. See How to create a fee from a template. If the app still needs to be set up on one of the fee's channels, the button reads Create fee and the fee is created as a Draft with a Finish your setup checklist (see Activate Sales Channels below).
-
Custom fee. Click Create custom fee, choose a method in the Select a Method window, and configure the form. The editor's cards are questions: What your customer sees, What it charges, What it applies to, Where it applies, When it applies, How it's enforced, and Where it works.
Fee Method
- Function Method (recommended) — Uses Shopify functions. Fees appear at checkout as part of the product or bundle, but are separated from the product price. Faster and more reliable for most stores.
- Everywhere Method — The simplest setup. Pick a few conditions (product tag, product vendor, collection, specific products, product type, storefront country, billing location, or customer tags) and the fee applies across your online store, checkout, headless storefronts, POS, and draft orders with no theme setup. See What is the Everywhere Method and how do I use it?.
- Block Method — Fees display as separate line items in checkout. Use this if your workflow depends on fee lines being distinct, or if you need product-based discounts to apply to fees (Plus Plan only).
For a detailed comparison and when to choose each, see Function vs Block Method with Magical Product Fees. Already using Block and want to switch? Copy your fee settings, set the fee to Draft, create a new fee with the Function Method, and paste the settings.
What your customer sees
Enter a title (e.g. "Recycling Fee") and, in Details, describe what the fee is for. The description is visible to customers at checkout.
Fee Type
- Product Fee — Applies to specific products or collections.
- Order Fee — Applies to the order subtotal (Starter supports subtotal only). (Plus Plan) You can also apply to order total.
What it charges
Set a fixed amount (e.g. $0.05) or a percentage (e.g. 1.5%). Percentage fees can carry a minimum and maximum.
Product Fee Options
If you chose Product Fee:
- Number of times fee applies: Every product (per quantity) or Once per product (max one per matching product).
- Bundle with: Matching Product (fee bundled with products, included in product-based discounts) or Other Product Fees (fee grouped with other fees under a placeholder, excluded from product discounts).
- Conditions: All products, Specific collections, Specific products, or Custom conditions.
Order Fee Options
If you chose Order Fee:
- Apply to: Subtotal (order subtotal before shipping/tax). (Plus Plan) You can also select Total to apply fees to the order total (after discounts, shipping, tax). Subtotal is calculated before any discounts, taxes, or shipping. Total is calculated after — use it when you need fees to apply to the final amount (Plus only).
Payment Method Fees
To add credit card surcharges, click Add payment methods and select Credit Cards. (Plus Plan) You can also select PayPal or Shop Pay for those transaction fees. Payment method fees require the Function method. On non-Plus stores, only credit card transactions through Shopify Payments are supported, and customers must accept the fee on the storefront before checkout. Payment method conditions do not apply on POS or with accelerated checkouts (Shop Pay, Apple Pay, Google Pay) — enable Hide Dynamic Checkout Buttons when Fees Apply so customers can't bypass the fee.
Location-Based Fees
- Click Add Locations.
- Select the countries, provinces, or states where the fee applies. Use the search field to find specific regions.
- Click Select in the modal, then Save.
Customer Tag Fees (Shopify Plus for Function fees; all plans for Everywhere fees)
To restrict a fee to specific customer segments:
- Click Enable customer tags.
- In the Update data access window, click Update to grant the app access to customer metafields.
- Click Add customer tags and select the tags the fee should apply to.
Use the search field to find tags. Only customers with at least one selected tag will see the fee.
- Click Save.
- Click Save. The fee's page opens as a summary; click Customize this fee any time to reopen the full form. The Set active / Set to draft toggle in the header saves immediately.
Activate Sales Channels
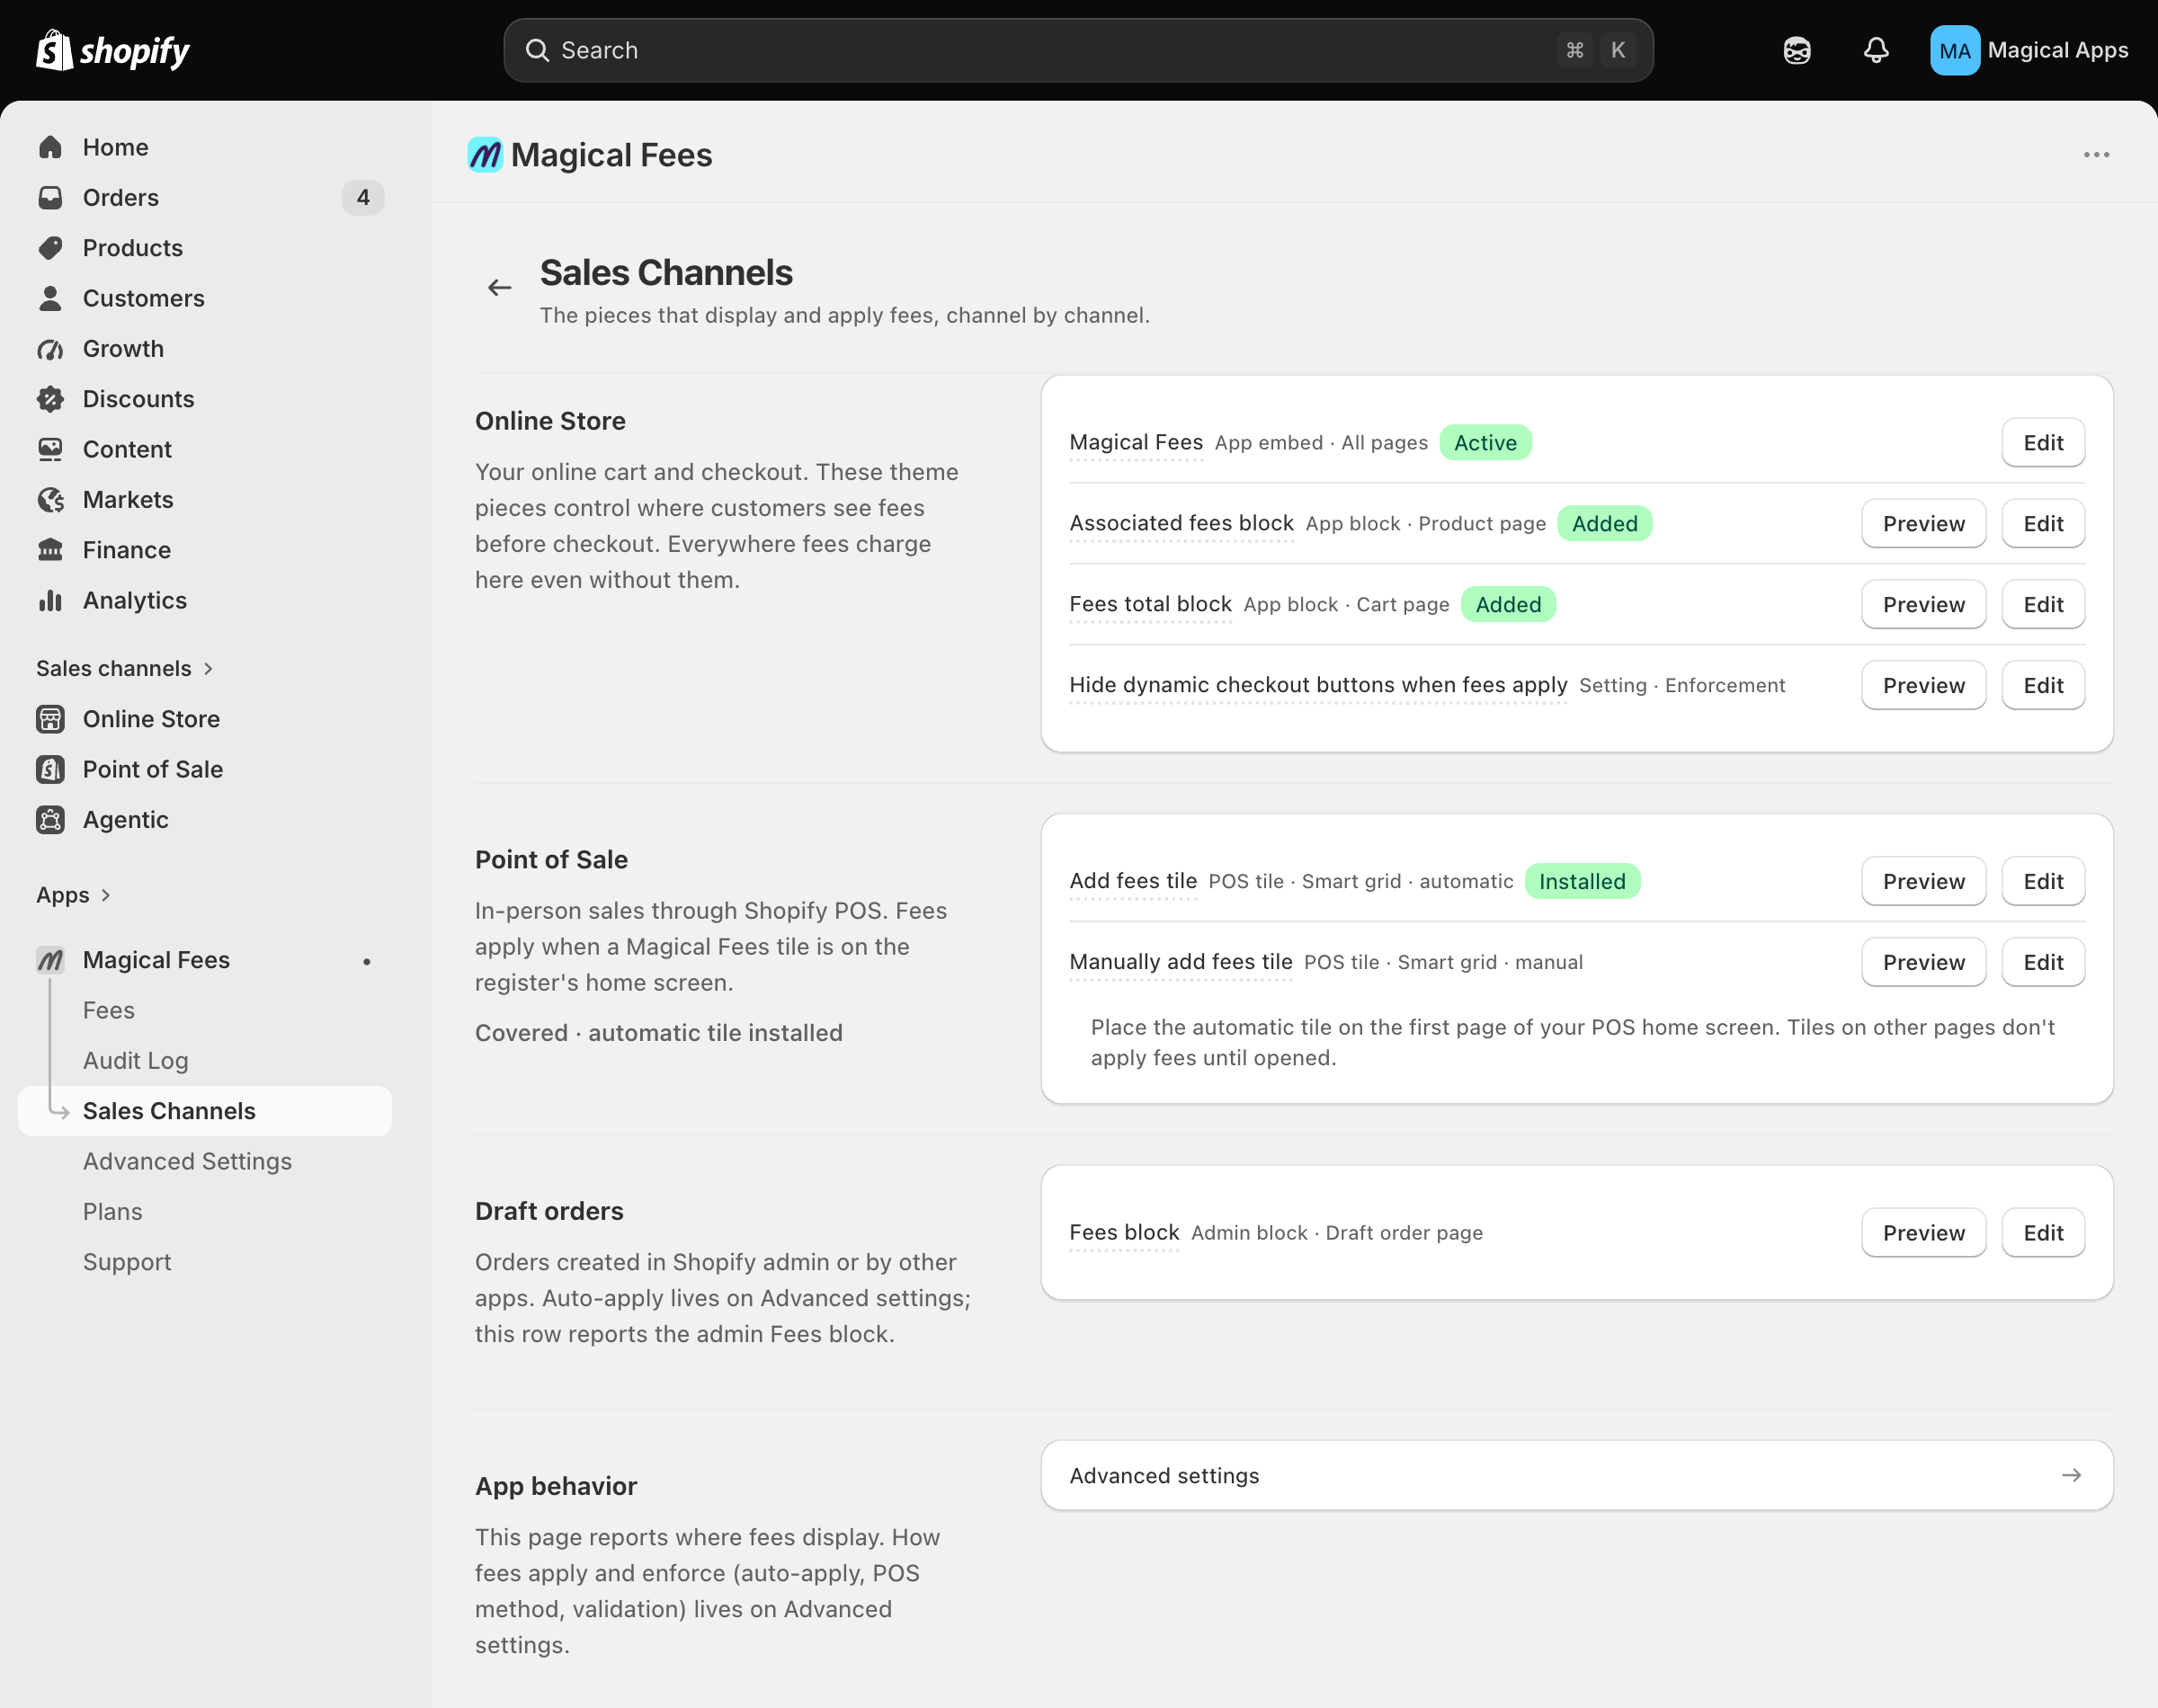
A fee only charges on channels the app is set up for. The fee's Where it works card shows each channel's status; a Setup required row has a button that takes you to the fix. A fee created before its channels were ready starts as a Draft with a Finish your setup checklist that covers the same steps and checks each one off when the app detects the change. You can also manage every piece from the Sales channels page, where each row has an Edit button with instructions.
Online Store
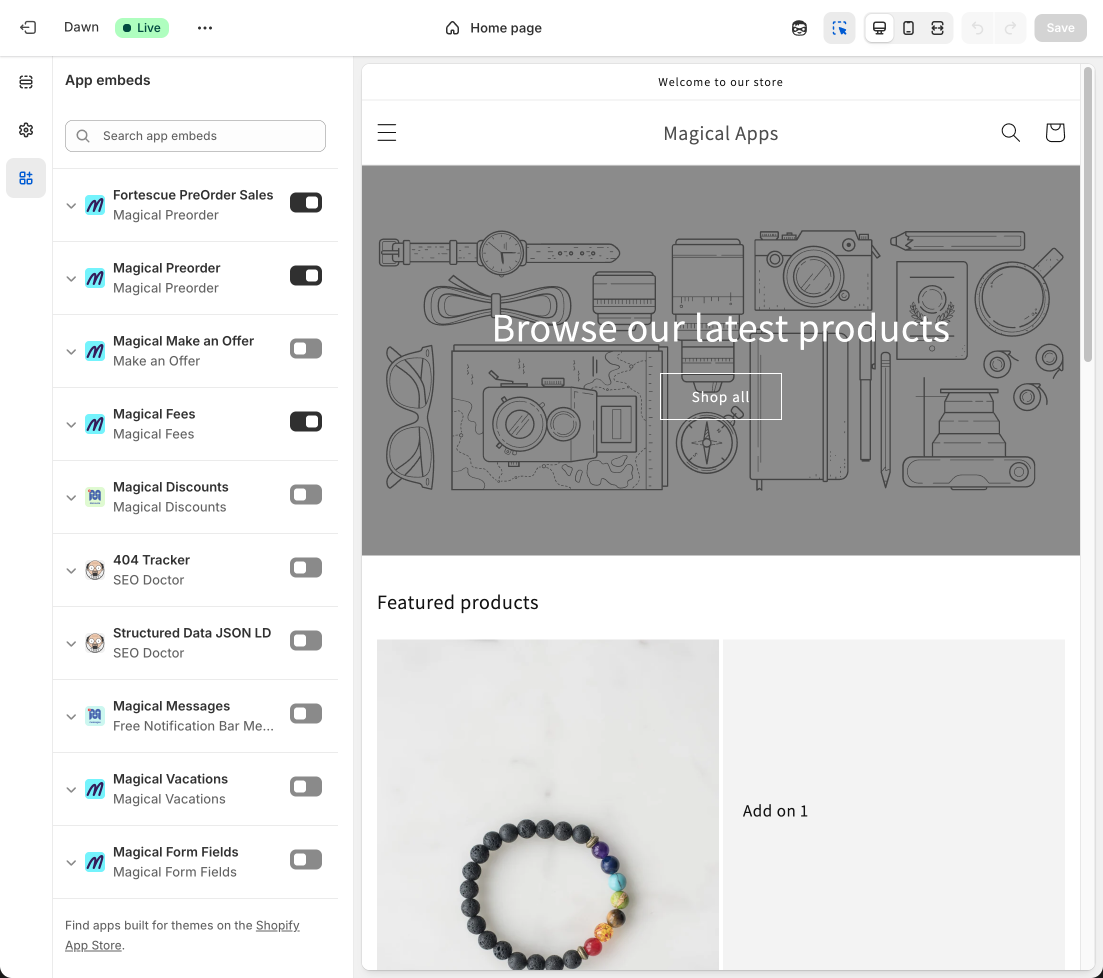
- On the fee's setup guide click Enable in theme editor, or on Sales channels click Edit next to the app embed, then Open theme editor.
- The Magical Fees app embed is preselected; toggle it on under Theme settings > App embeds.
Enable the Checkout UI Extension (Plus / Shopify Plus)
The Checkout UI Extension shows fees natively in checkout and works with Shop Pay. Set it up once:
- In Shopify admin, go to Settings > Checkout.
- Click Edit on your active checkout profile.
- In the checkout editor, select the Checkout page from the top menu.
- In the Order summary section, click Add block.
- Select Magical Product Fees and place it in the recommended area.
- Click the Magical Product Fees block in the left panel.
- Under Checkout behavior, enable:
- Include app block in Shop Pay
- Allow app to block checkout (required so the app can validate consent or conditions before checkout completes)
- Click Save.
For more detail on the Checkout UI Extension (Shop Pay, behavior options, troubleshooting), see the Checkout UI Extension deep dive.
Set Up Fees in Shopify POS
To use fees in POS, add a fees tile to your POS home screen and ensure your fee rules include the POS sales channel. For the full walkthrough, see How to set up Magical Fees for Shopify POS.
Video Walkthroughs
- Product fees (eco-fees, deposits, per-product fees): How to Set Up Magical Fees (Product Fees)
- Order fees (surcharges, service charges, subtotal fees): How to Set Up Magical Fees (Order Fees)
Need Help?
Visit our Help Center for troubleshooting and FAQs. For specific fee types (tariffs, bottle deposits, excise taxes, etc.), check the use-case guides or the setup library.
Always label deposits separately for compliance
Display bottle deposit fees as a clearly labeled, separate line item at checkout and on receipts. This meets regulatory transparency requirements, builds customer trust by showing exactly what they're paying, and makes it significantly easier to track deposits for reporting and audits. Use a clear label like "Bottle deposit" or "Container deposit (CRV)" so customers immediately understand the charge.