Some US states require sellers to collect a mattress recycling fee on each mattress and box spring sold into the state. Magical Fees has ready-made templates for California, Connecticut, Oregon, and Rhode Island, with each state’s amount filled in. For example, California’s mattress recycling charge is $18.00 per mattress and box spring (since April 1, 2026).
To set up a mattress recycling fee on your store, there are two required setup steps in Magical Fees:
- Add the fee from your state’s template (this defines what to charge and when), and
- Turn on the Magical Fees app embed (this is what turns the fee on in your online store).
Step 1 (Required): Add the fee from your state’s template
- In your Shopify admin, open the Magical Fees app and click Add fee.
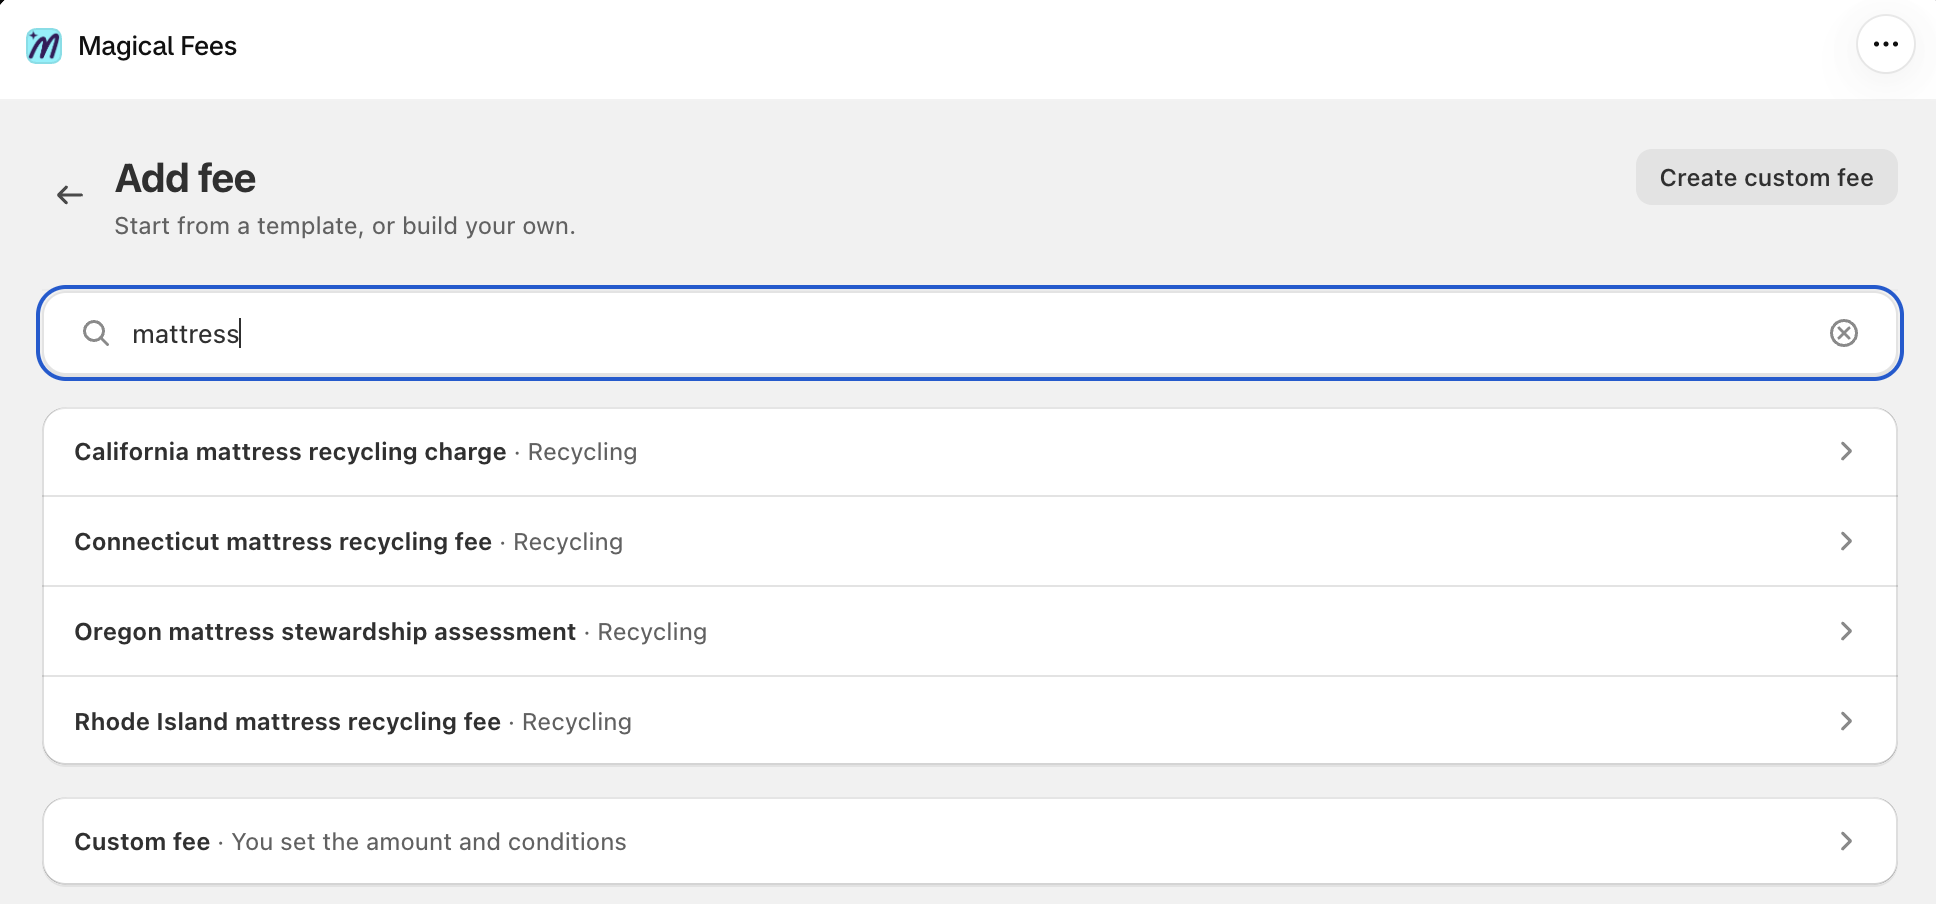
- Search for mattress and choose your state’s template: California mattress recycling charge, Connecticut mattress recycling fee, Oregon mattress stewardship assessment, or Rhode Island mattress recycling fee.
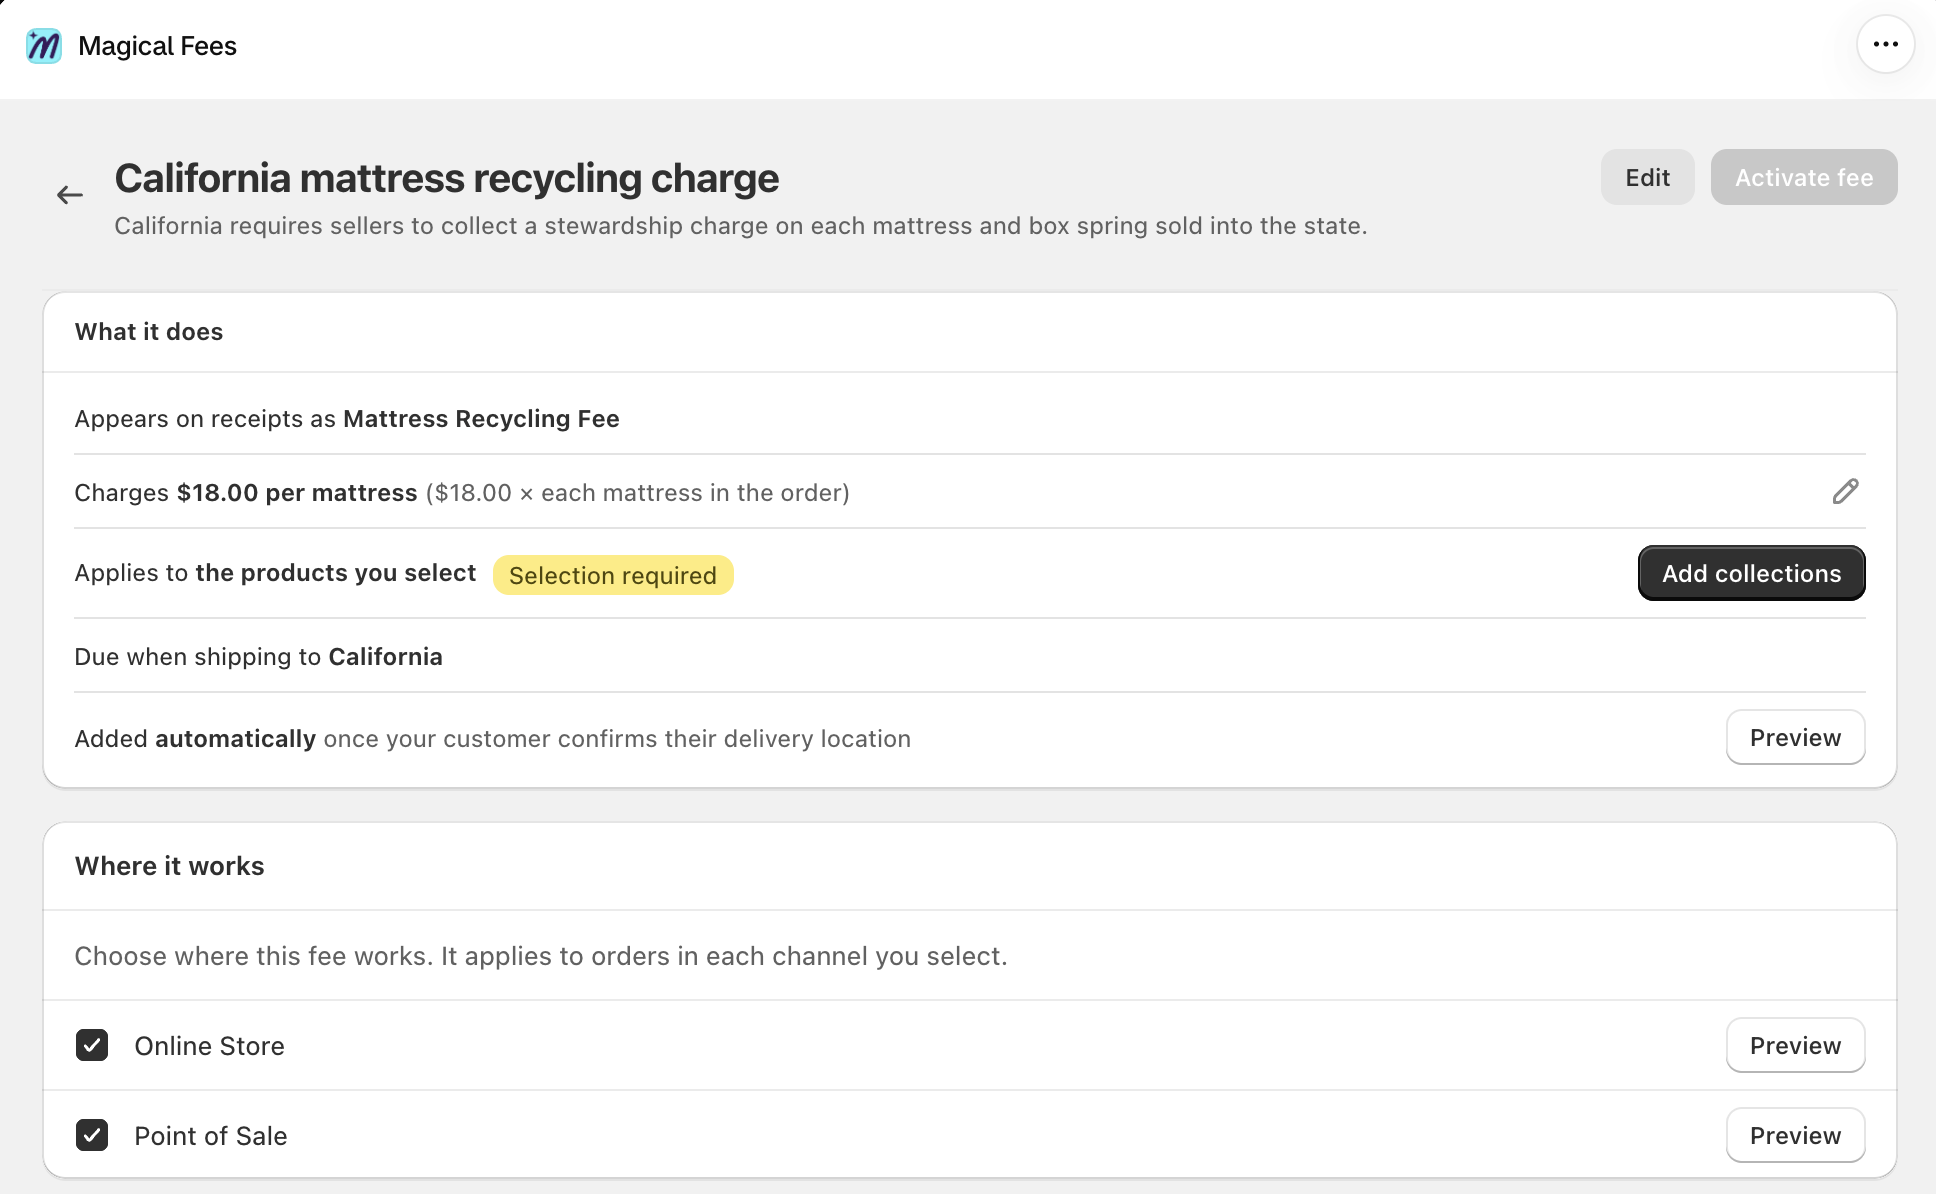
- Review what the template does. The California template appears on receipts as Mattress Recycling Fee, charges $18.00 for each mattress in the order, is due when shipping to California, and works in the Online Store and on Point of Sale.
- Click Add collections and pick the collection that holds your mattresses and box springs. Until you add one, the fee isn’t charged on anything.
- Click Activate fee. The badge next to the fee’s title changes to Active.
Note: State amounts change. Check the current rate with your state’s program before you activate the fee. To change the amount, click Edit and update Amount under What it charges.
What is considered a government-mandated fee? Government-mandated fees are legally required charges imposed by a government authority, such as recycling fees, eco fees, or bottle deposits. Customer consent is not required for these types of fees, so the mattress templates add the fee automatically. Fees added at the merchant’s discretion, such as credit card surcharges, tariff surcharges, or service fees, are not government-mandated and require customer consent under Shopify’s policies.
How customers confirm their location
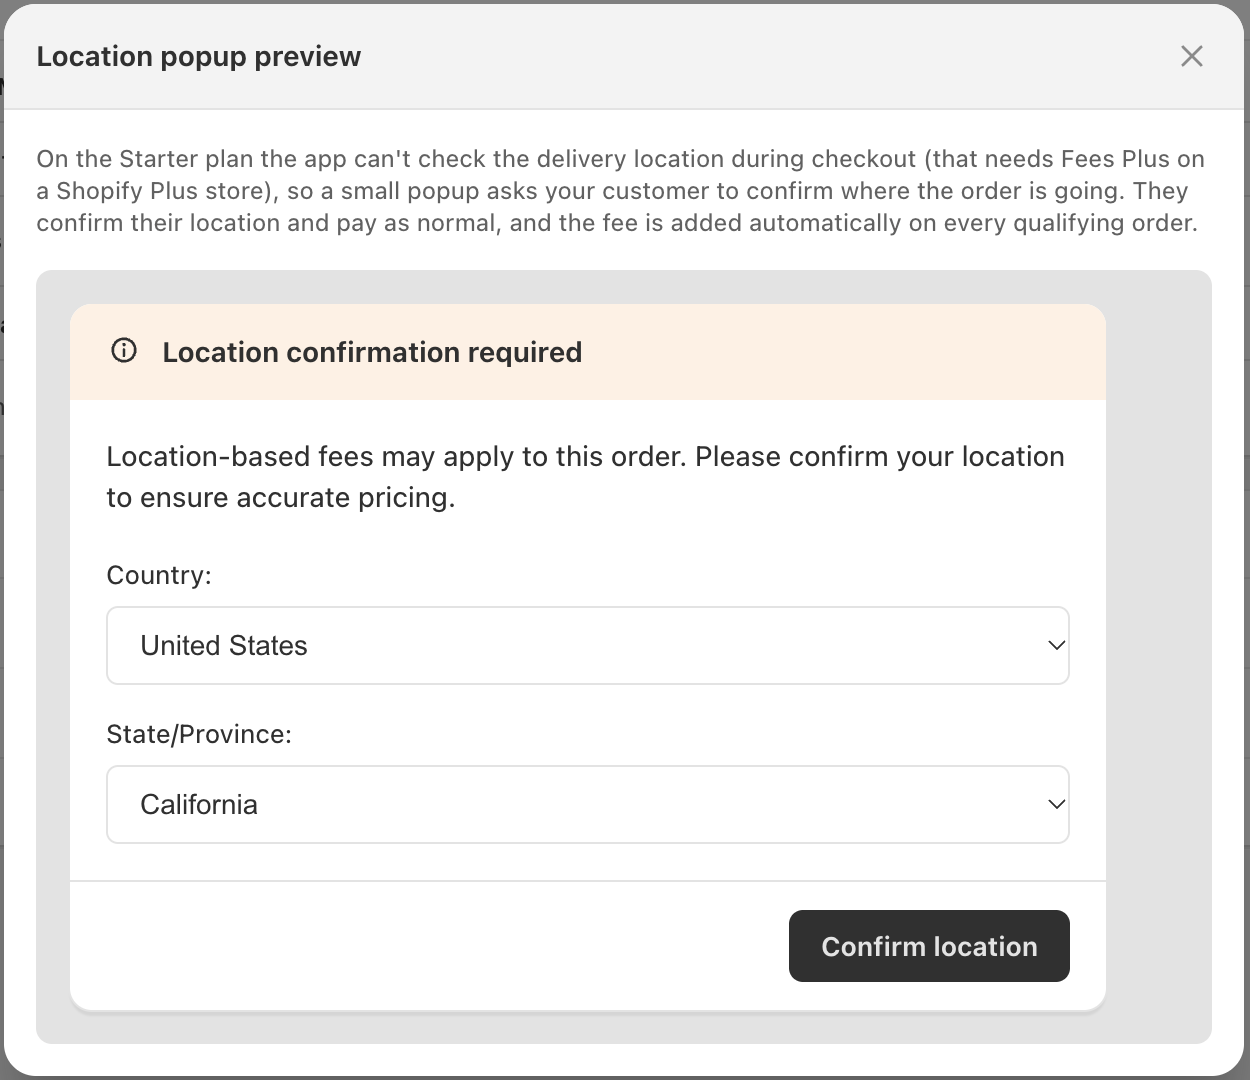
The fee only applies to orders shipping to the state. On plans other than Plus, customers confirm their delivery location in a small popup before checkout. They then pay as normal, and the fee is added automatically on every qualifying order. With Shopify Plus and the Plus plan, Magical Fees checks the delivery location at checkout instead. To see the popup, click Preview next to “Added automatically” on the template.
Change the fee settings (optional)
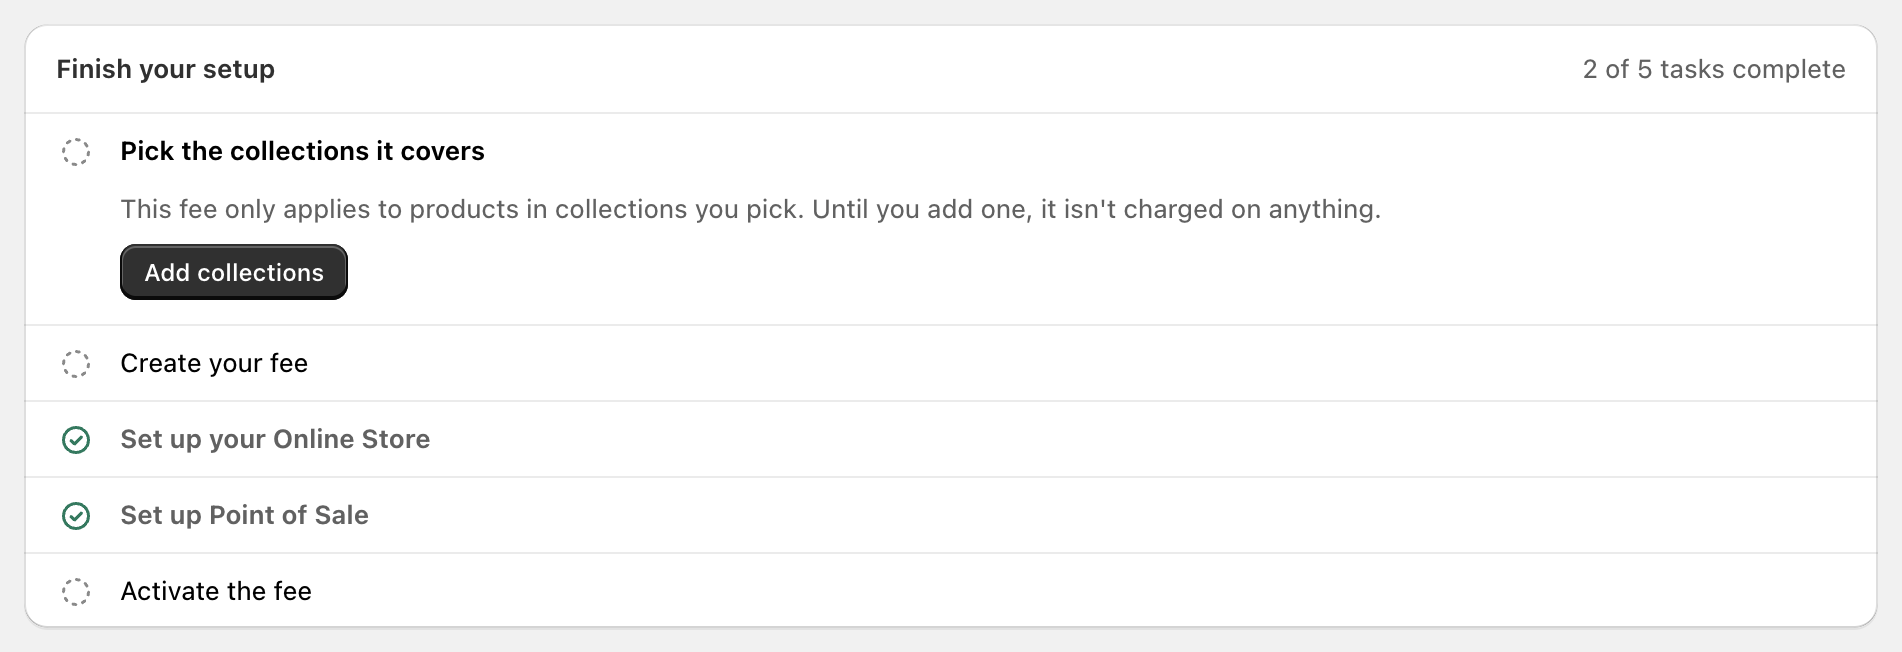
Click Edit on the template to see every setting. The Finish your setup card at the top shows what’s left to do.
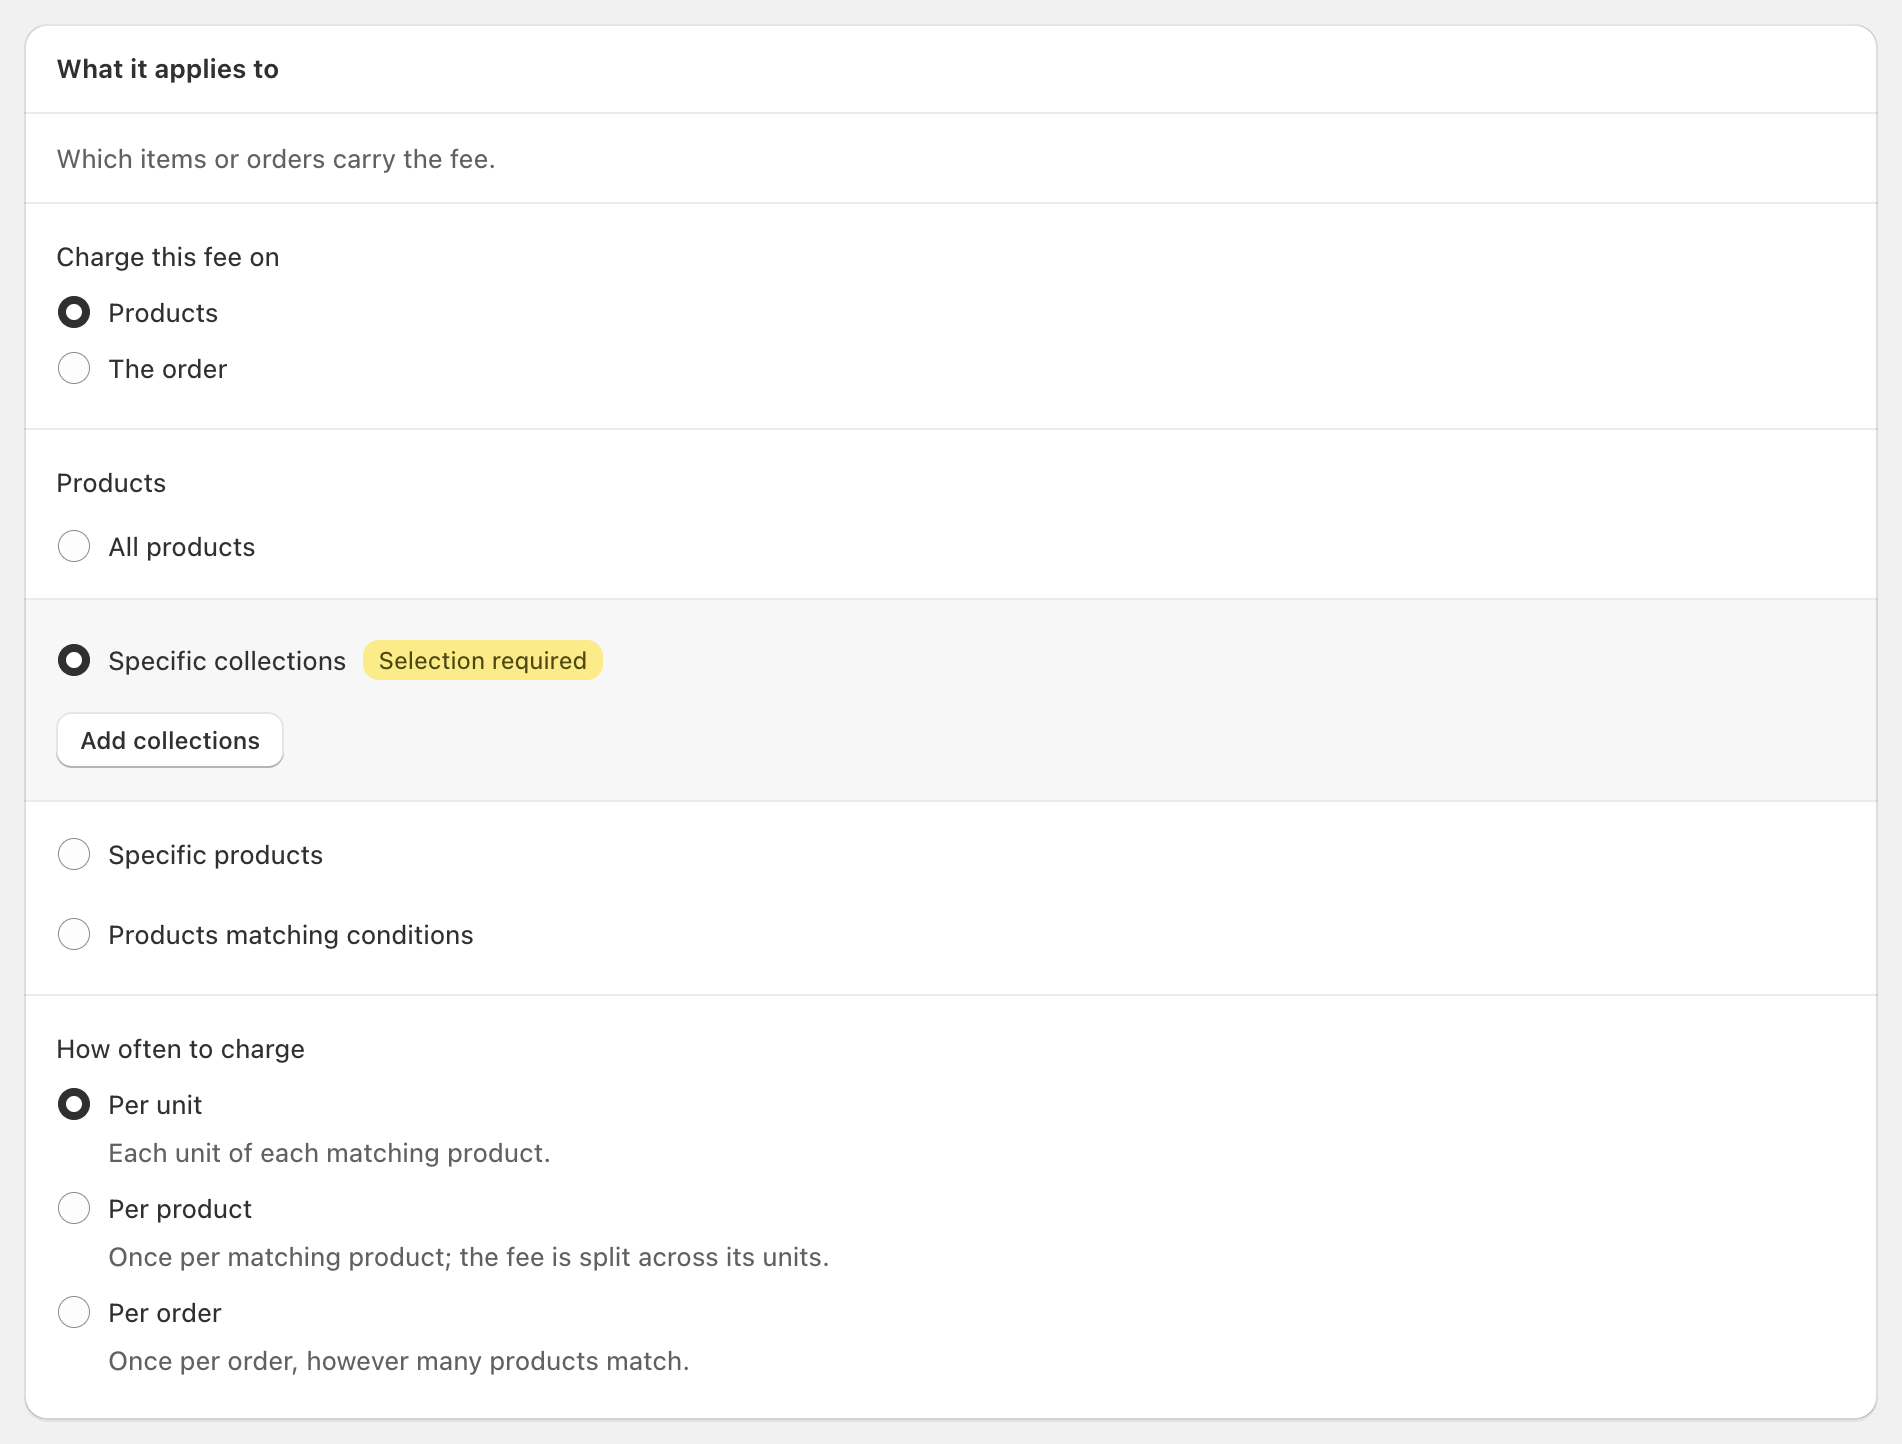
What it applies to: Charge this fee on is set to Products, and Specific collections is selected under Products. Under How often to charge, Per unit charges the fee once for each mattress (for example, 2 mattresses = 2 fees). Per product charges once per matching product, and Per order charges once per order.
How it appears: Under Bundle the fee, choose how the fee shows in the cart and checkout.
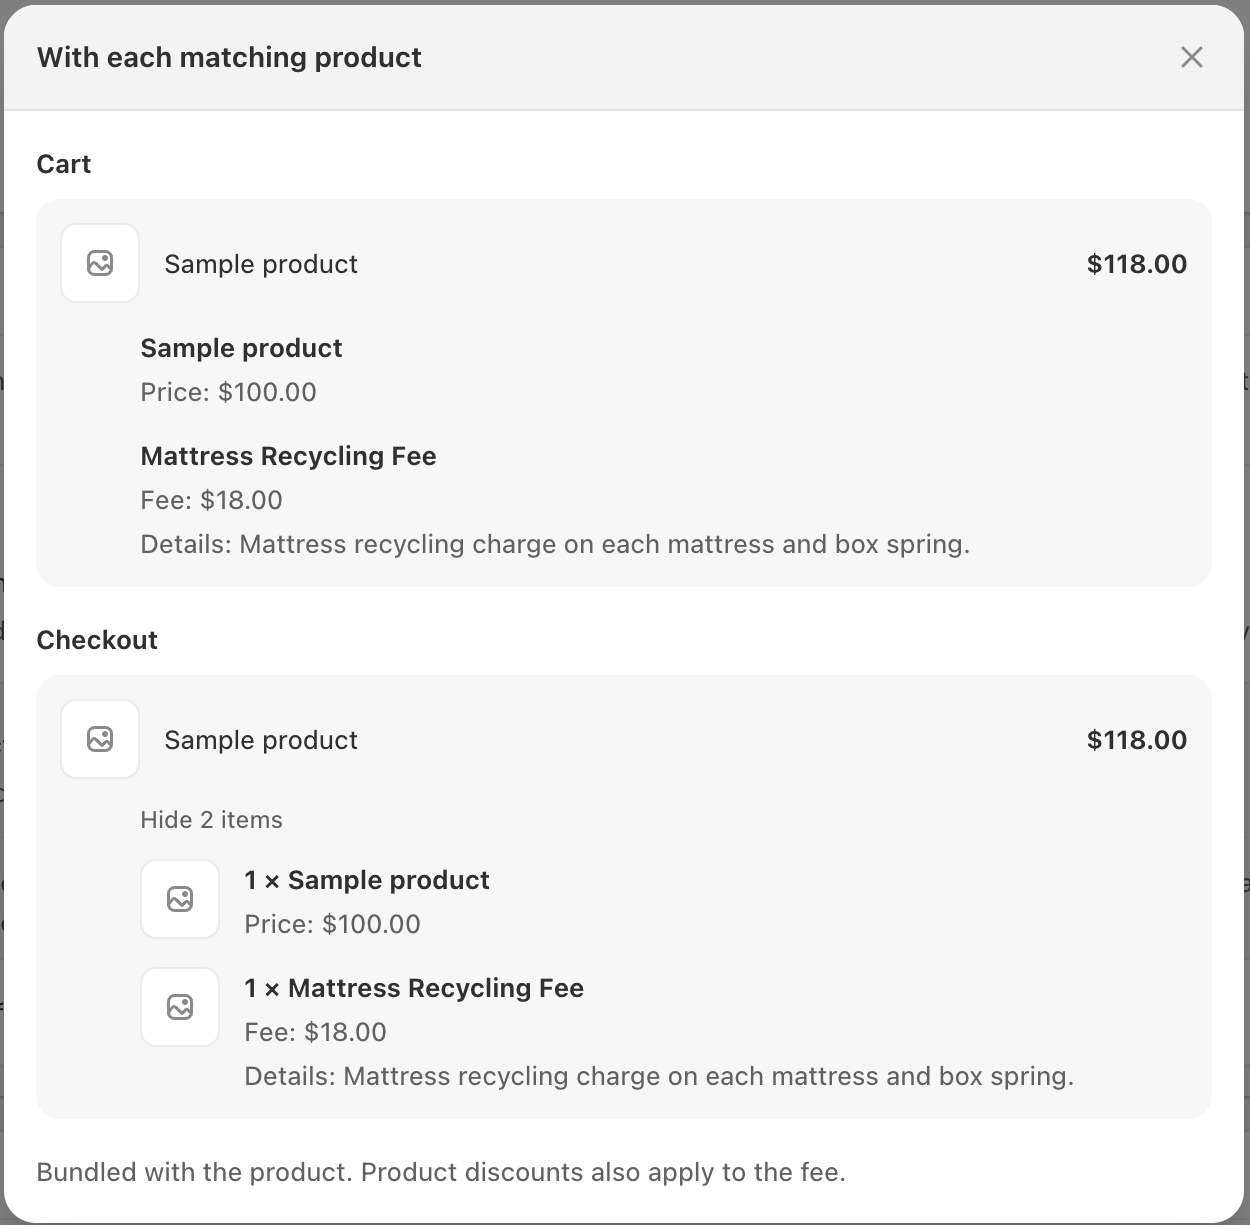
With each matching product: The fee is bundled with each mattress and shown beneath it. Product discounts also apply to the fee.
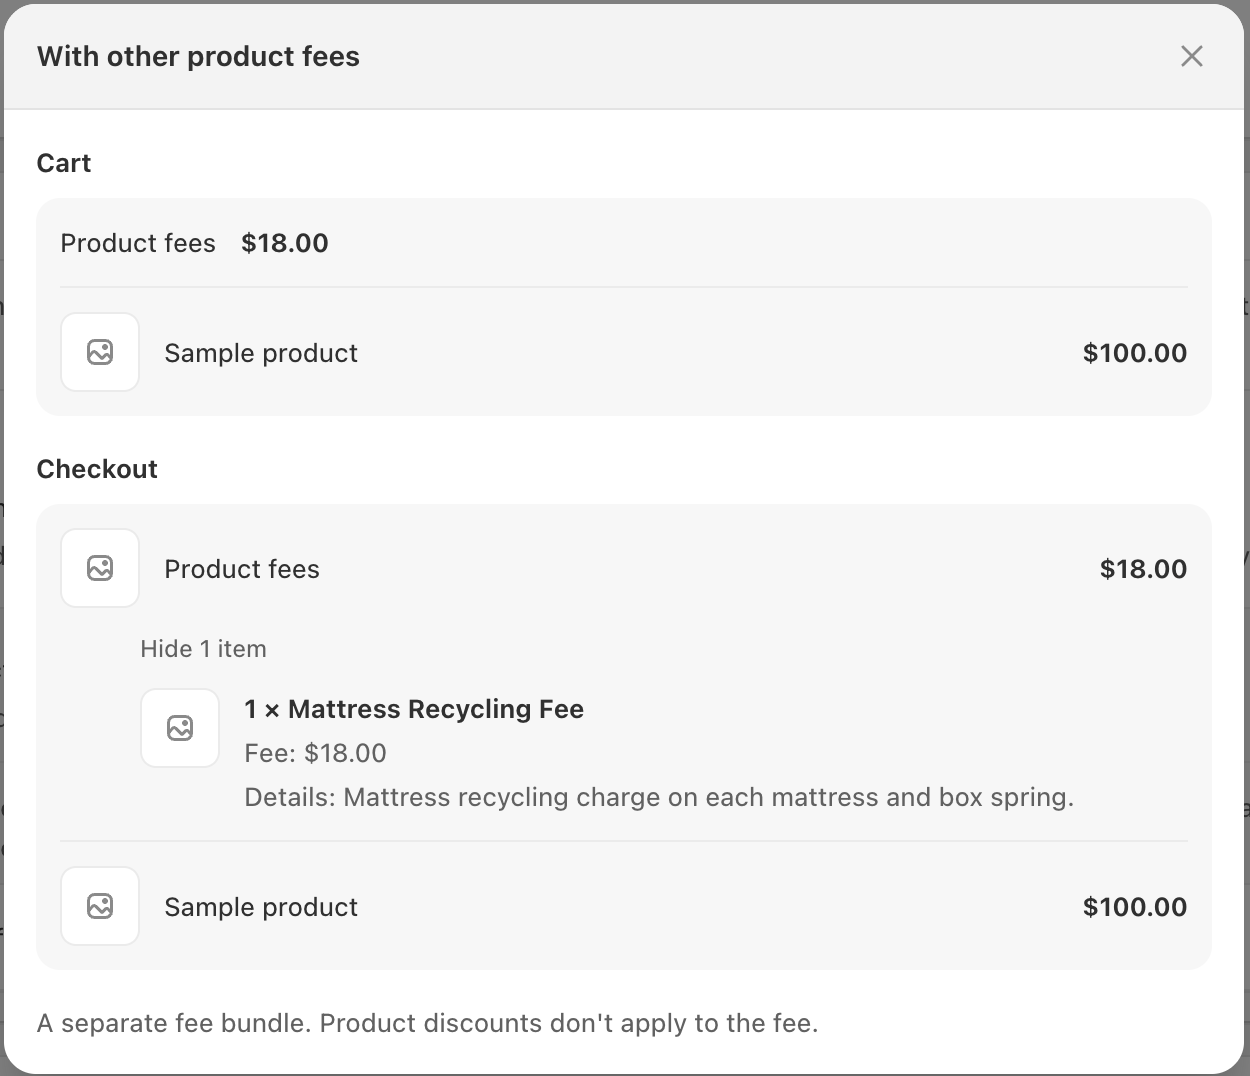
With other product fees (the template’s default): The fee is grouped with other product fees in a separate bundle. Product discounts don’t apply to the fee.
Where it works: The template turns on Online Store and Point of Sale. On POS, fees apply when a Magical Fees tile is on the register’s home screen.
Step 2 (Required): Turn on the Magical Fees app embed
Note: This is a one-time setup step. If you already completed it during your initial setup, you can skip it.
- In the Magical Fees app, open Sales Channels.
- Under Online Store, find the Magical Fees row (App embed · All pages). If it says Active, go to the next part of this step.
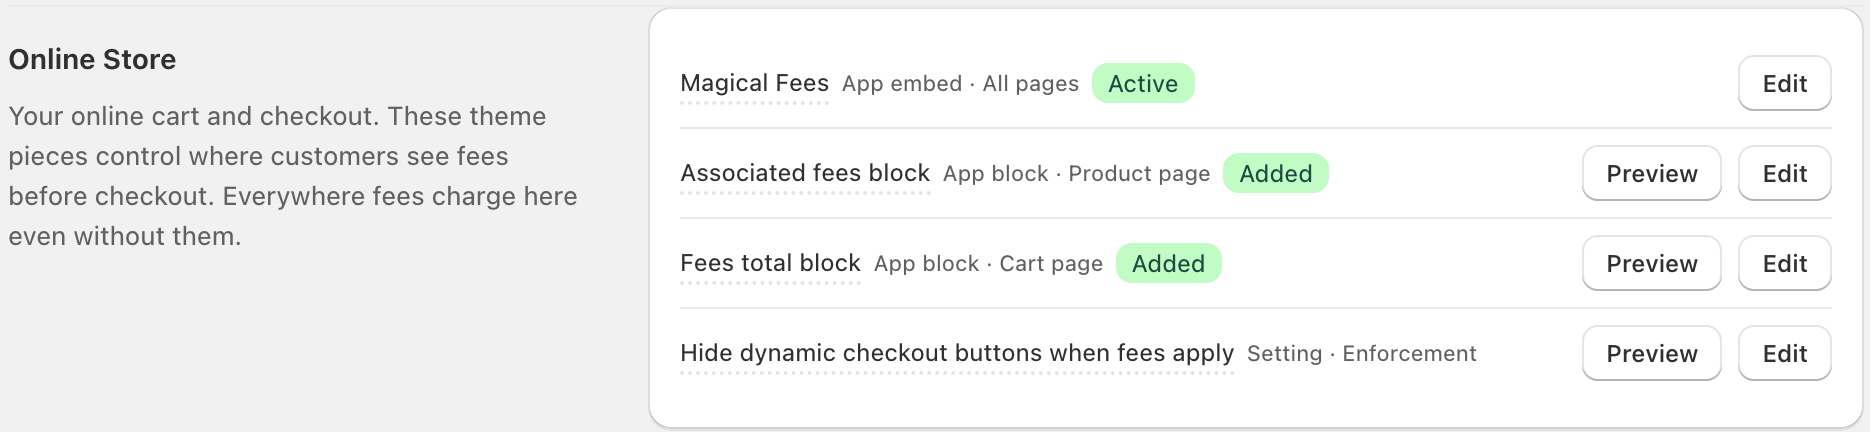
- If it says Deactivated, click Edit, then Open theme editor. Under App embeds, turn on Magical Fees and click Save. This is required for fees to apply in your online store.
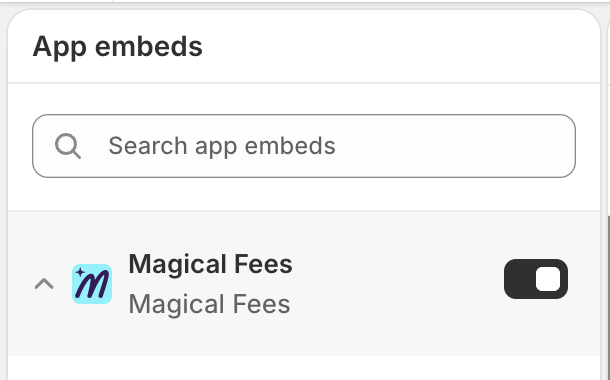
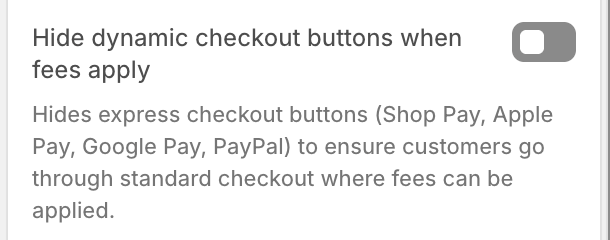
Then turn on Hide dynamic checkout buttons when fees apply, so customers don’t skip the checkout where the fee is added:
- On Sales Channels, find Hide dynamic checkout buttons when fees apply and click Edit, then Open theme editor.
- In the Magical Fees app embed, turn on Hide dynamic checkout buttons when fees apply and click Save.
Step 3 (Optional): Help customers understand the fee
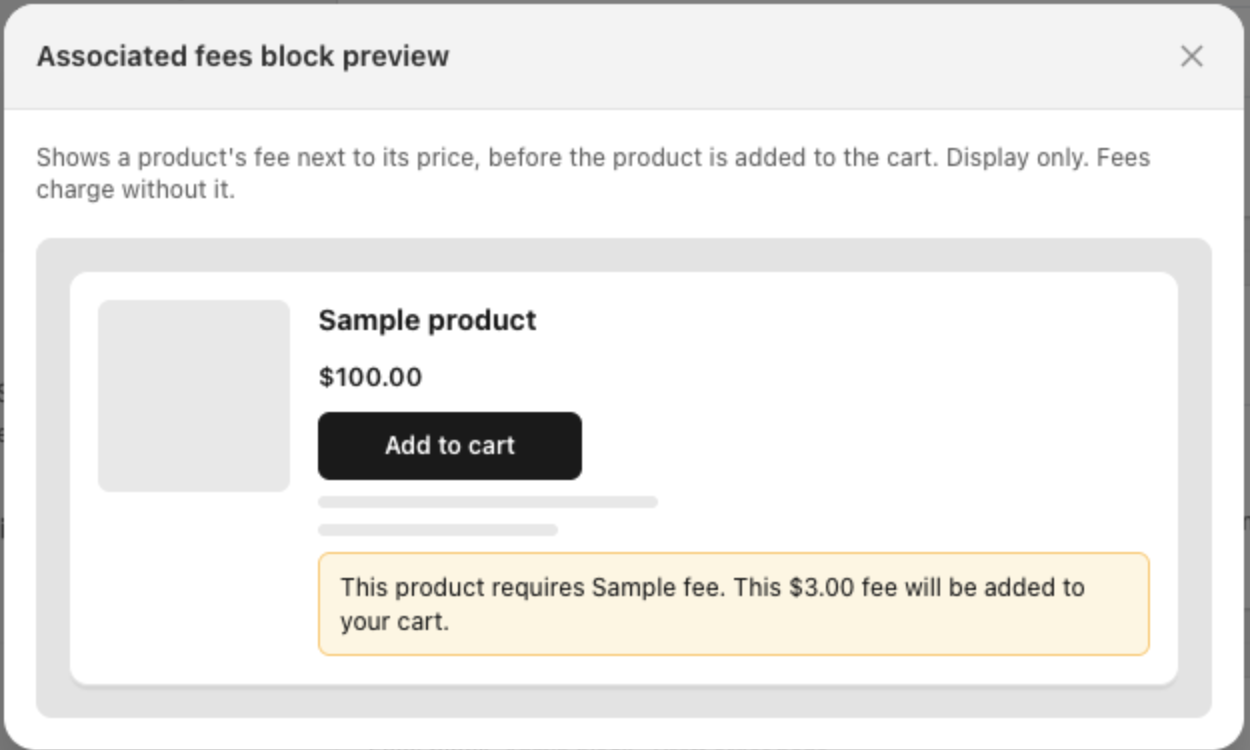
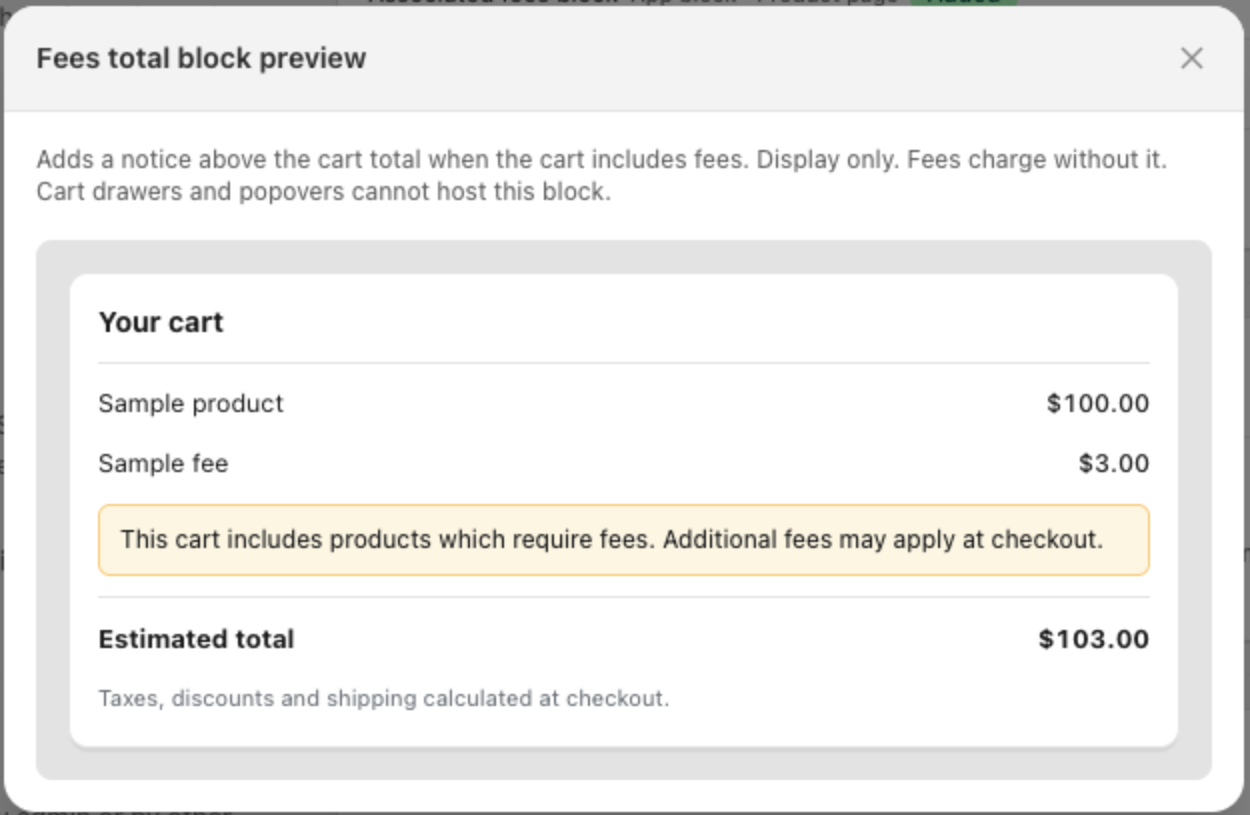
These blocks only display the fee. The fee is charged without them.
Associated fees block: Shows the fee next to the product’s price on the product page, before it’s added to the cart.
Fees total block: Adds a notice above the cart total when the cart includes fees. It works on the cart page, not in cart drawers or popovers.
To add a block:
- In the Magical Fees app, open Sales Channels.
- Under Online Store, find Associated fees block or Fees total block, and click Edit, then Open theme editor.
- In the theme editor, click Add block. Under Apps, choose Associated fees (product page) or Fees total (cart page).
- Click Save.
Always label deposits separately for compliance
Display bottle deposit fees as a clearly labeled, separate line item at checkout and on receipts. This meets regulatory transparency requirements, builds customer trust by showing exactly what they're paying, and makes it significantly easier to track deposits for reporting and audits. Use a clear label like "Bottle deposit" or "Container deposit (CRV)" so customers immediately understand the charge.
Originally from our Help Center