This guide covers Starter Plan and Growth Plan.
Jump to: Starter Plan · Growth Plan
Install Magical Form Fields from the Shopify App Store, then follow the steps below to go live.
Step 1: Create a field group
- In Shopify admin, go to the Magical Form Fields app.
- Click Create field group.
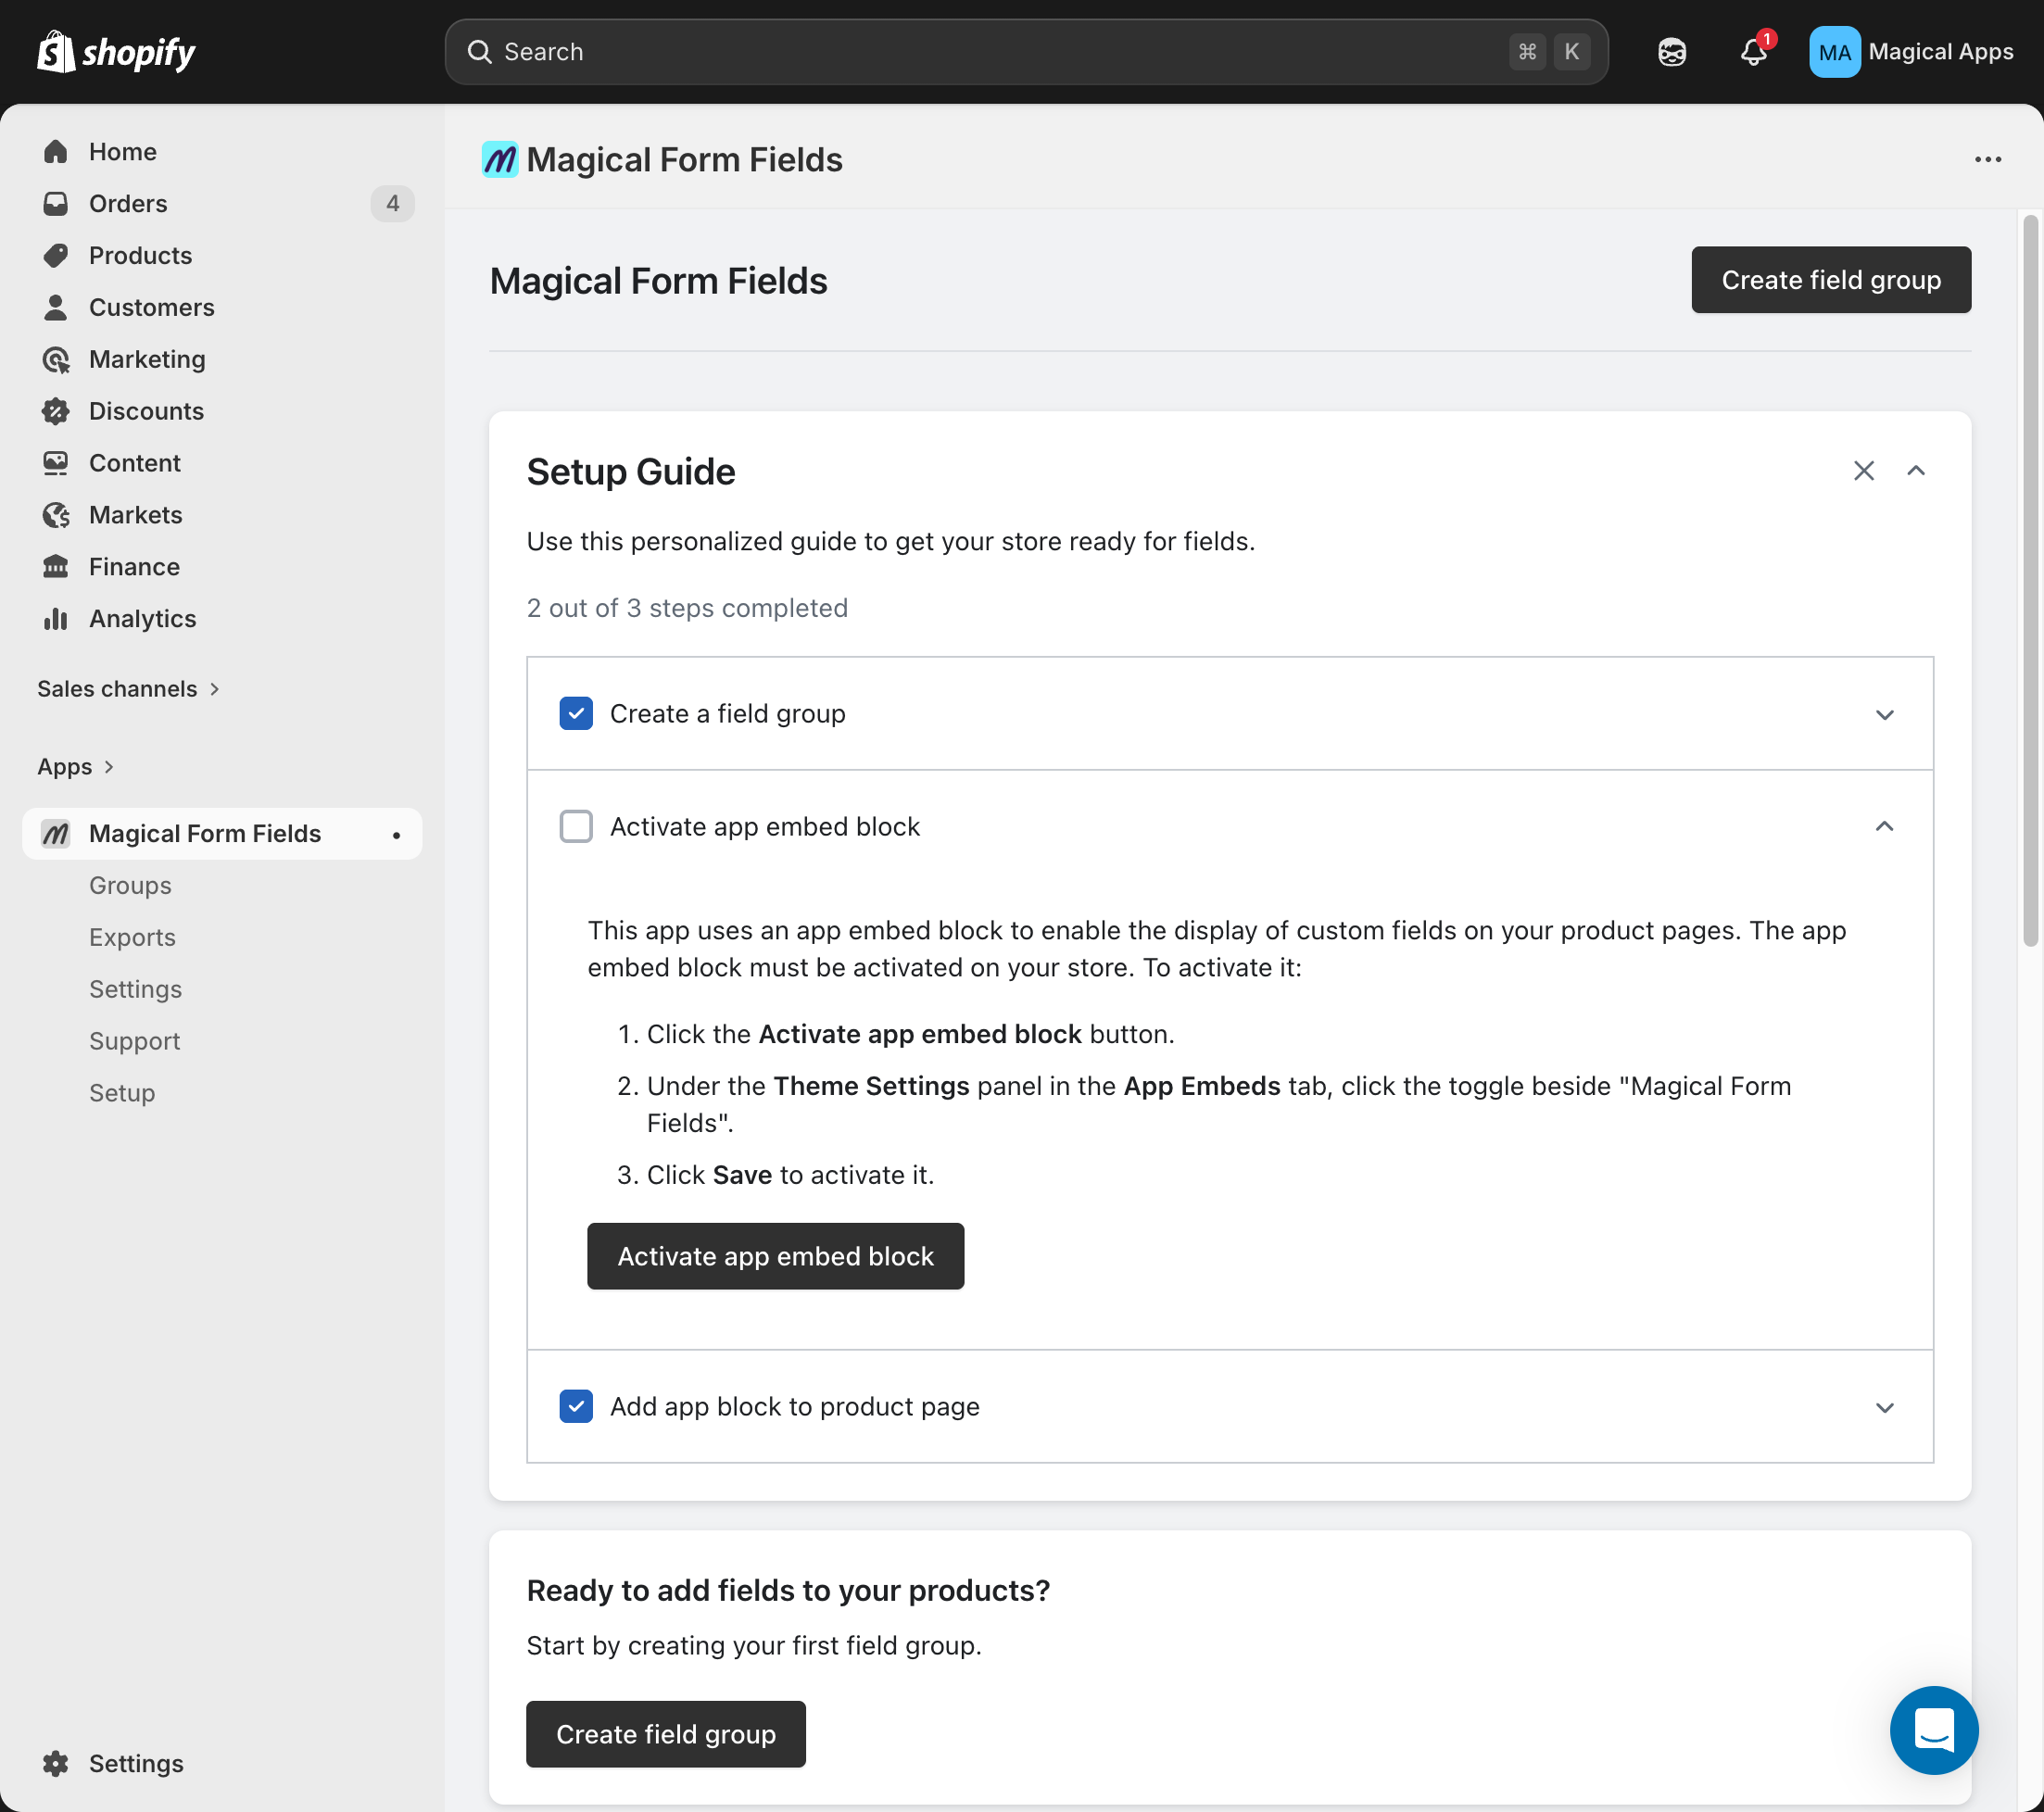
- On the Create Field Group page:
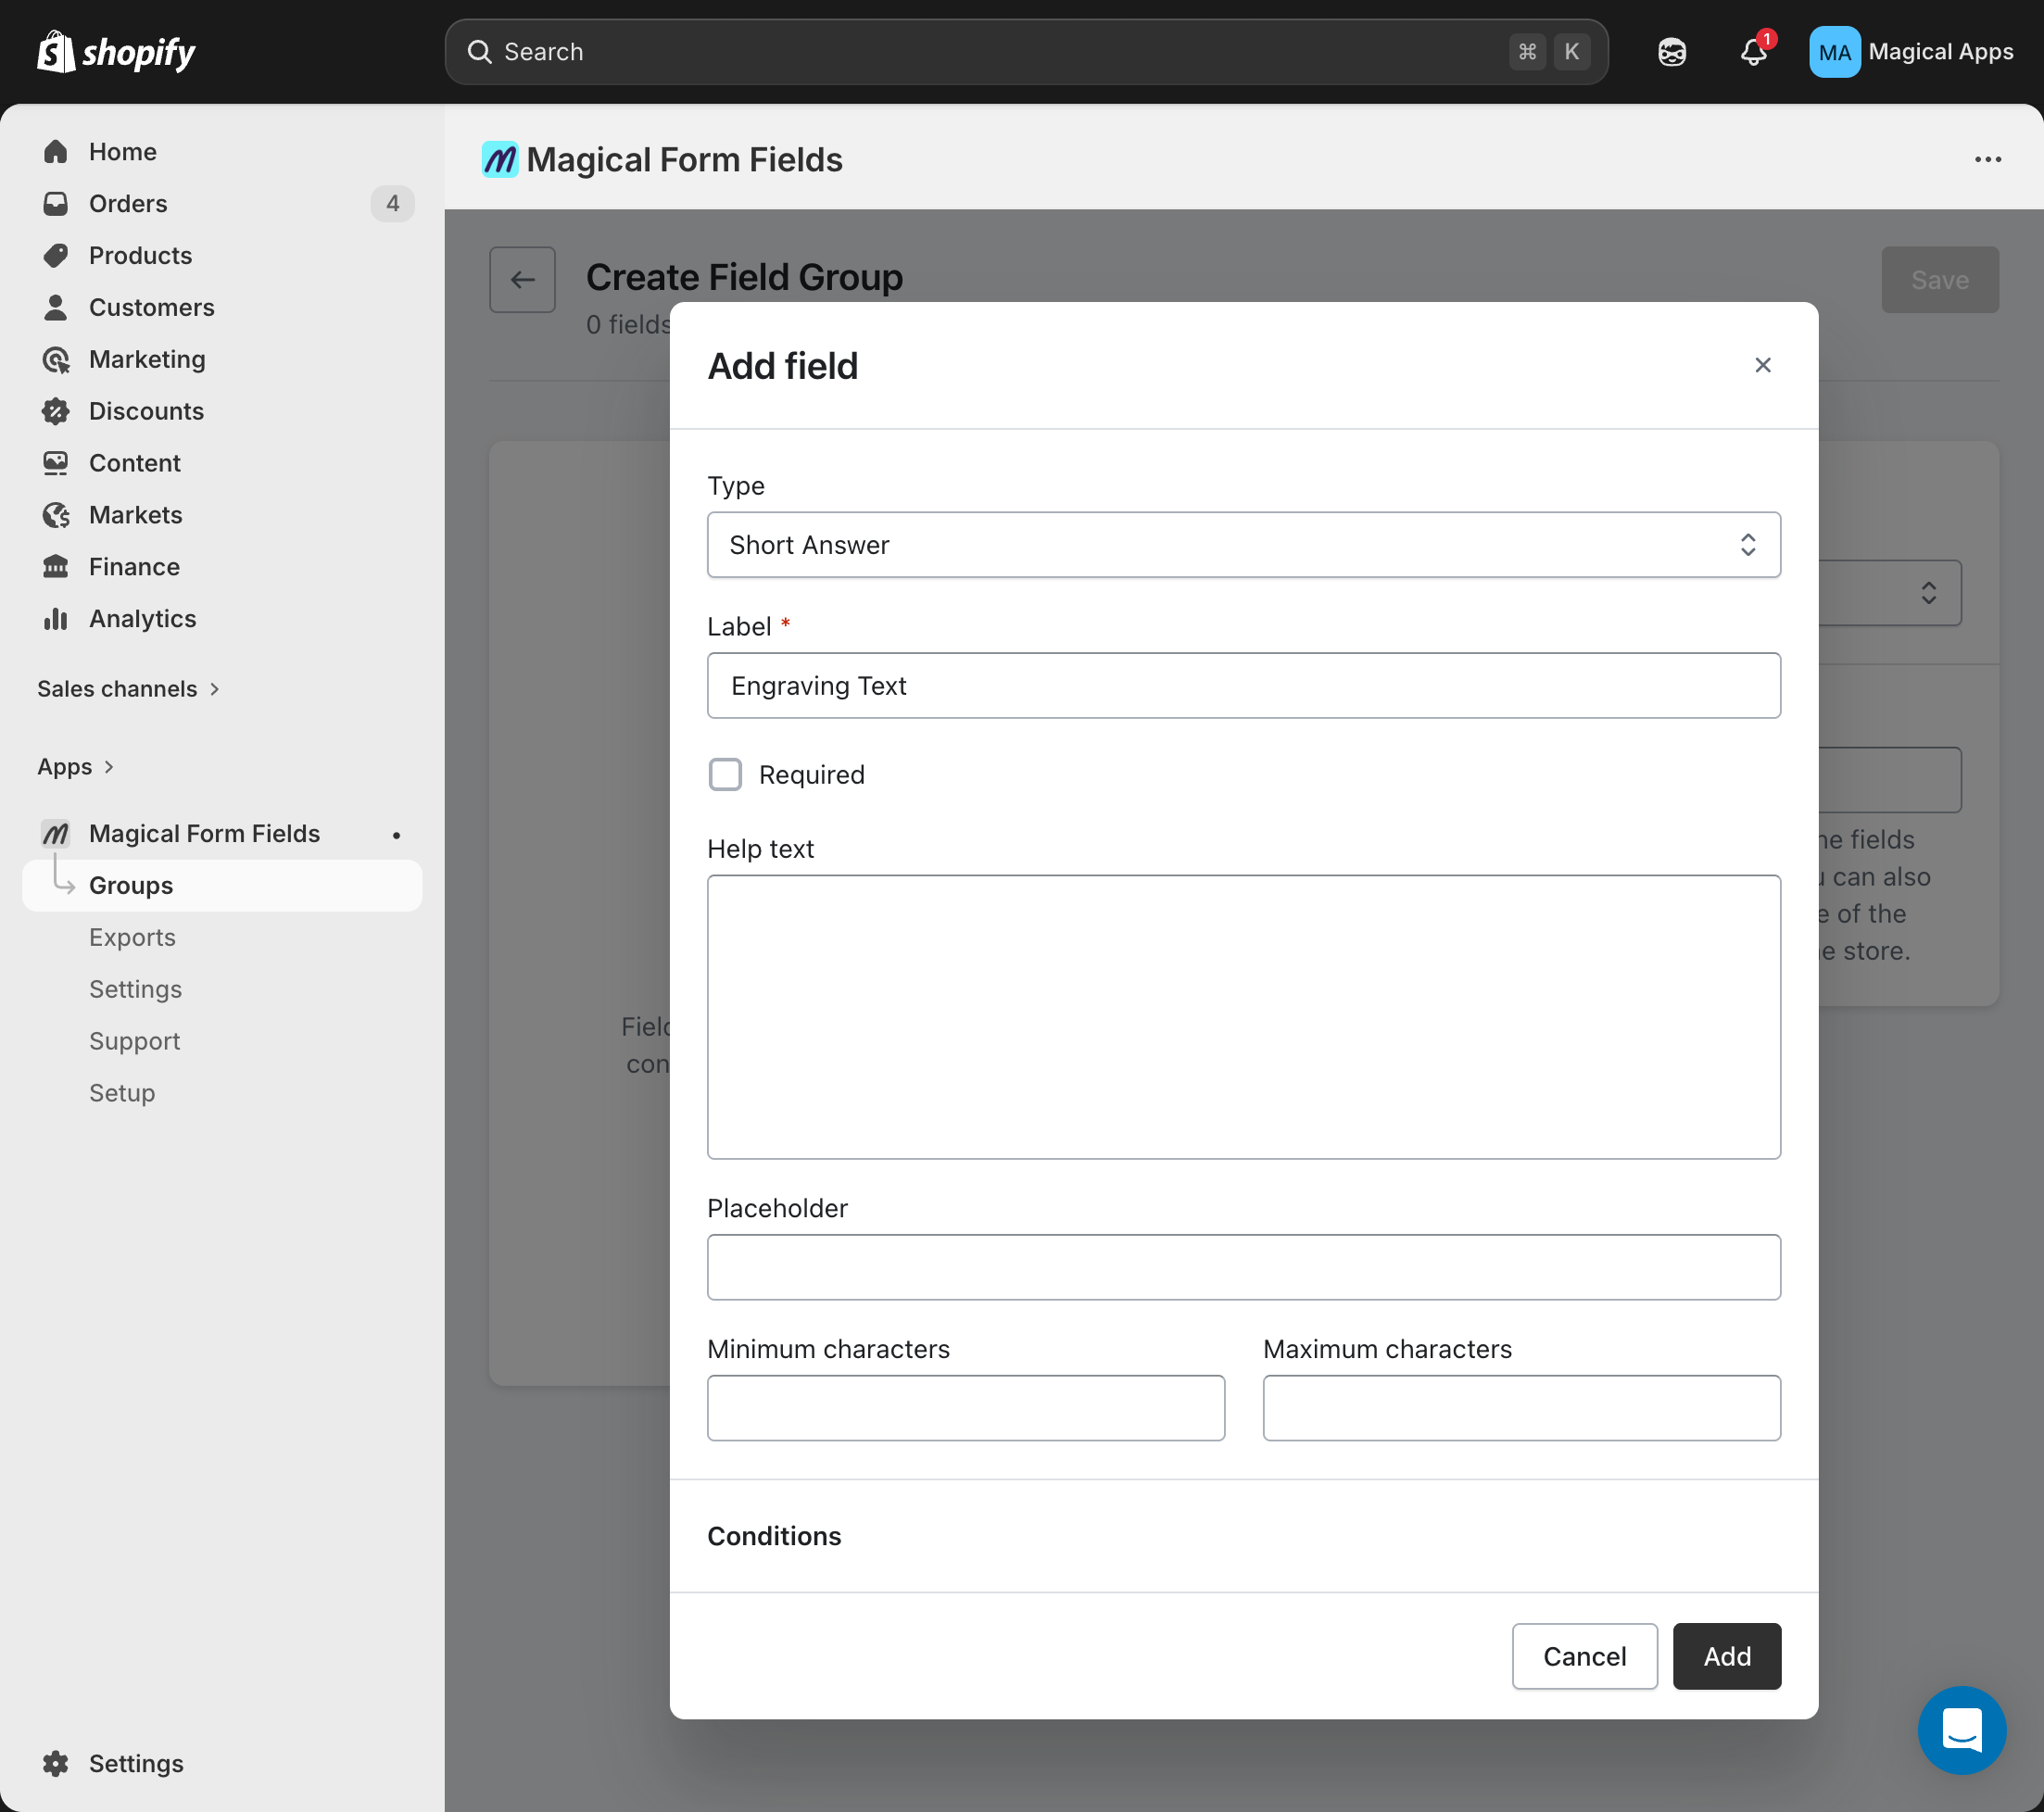
- Click Add field.
- Under Type, select the field type you want.
- Fill in the required fields, then click Add.
- Under Conditions, choose the products or collections the fields apply to. (Growth Plan) You can also choose whether fields apply to the cart.
- Click Save and confirm the field group shows as Active.
Step 2: Activate app embed block
Note: This is a one-time setup. If you've already done it, skip this step.
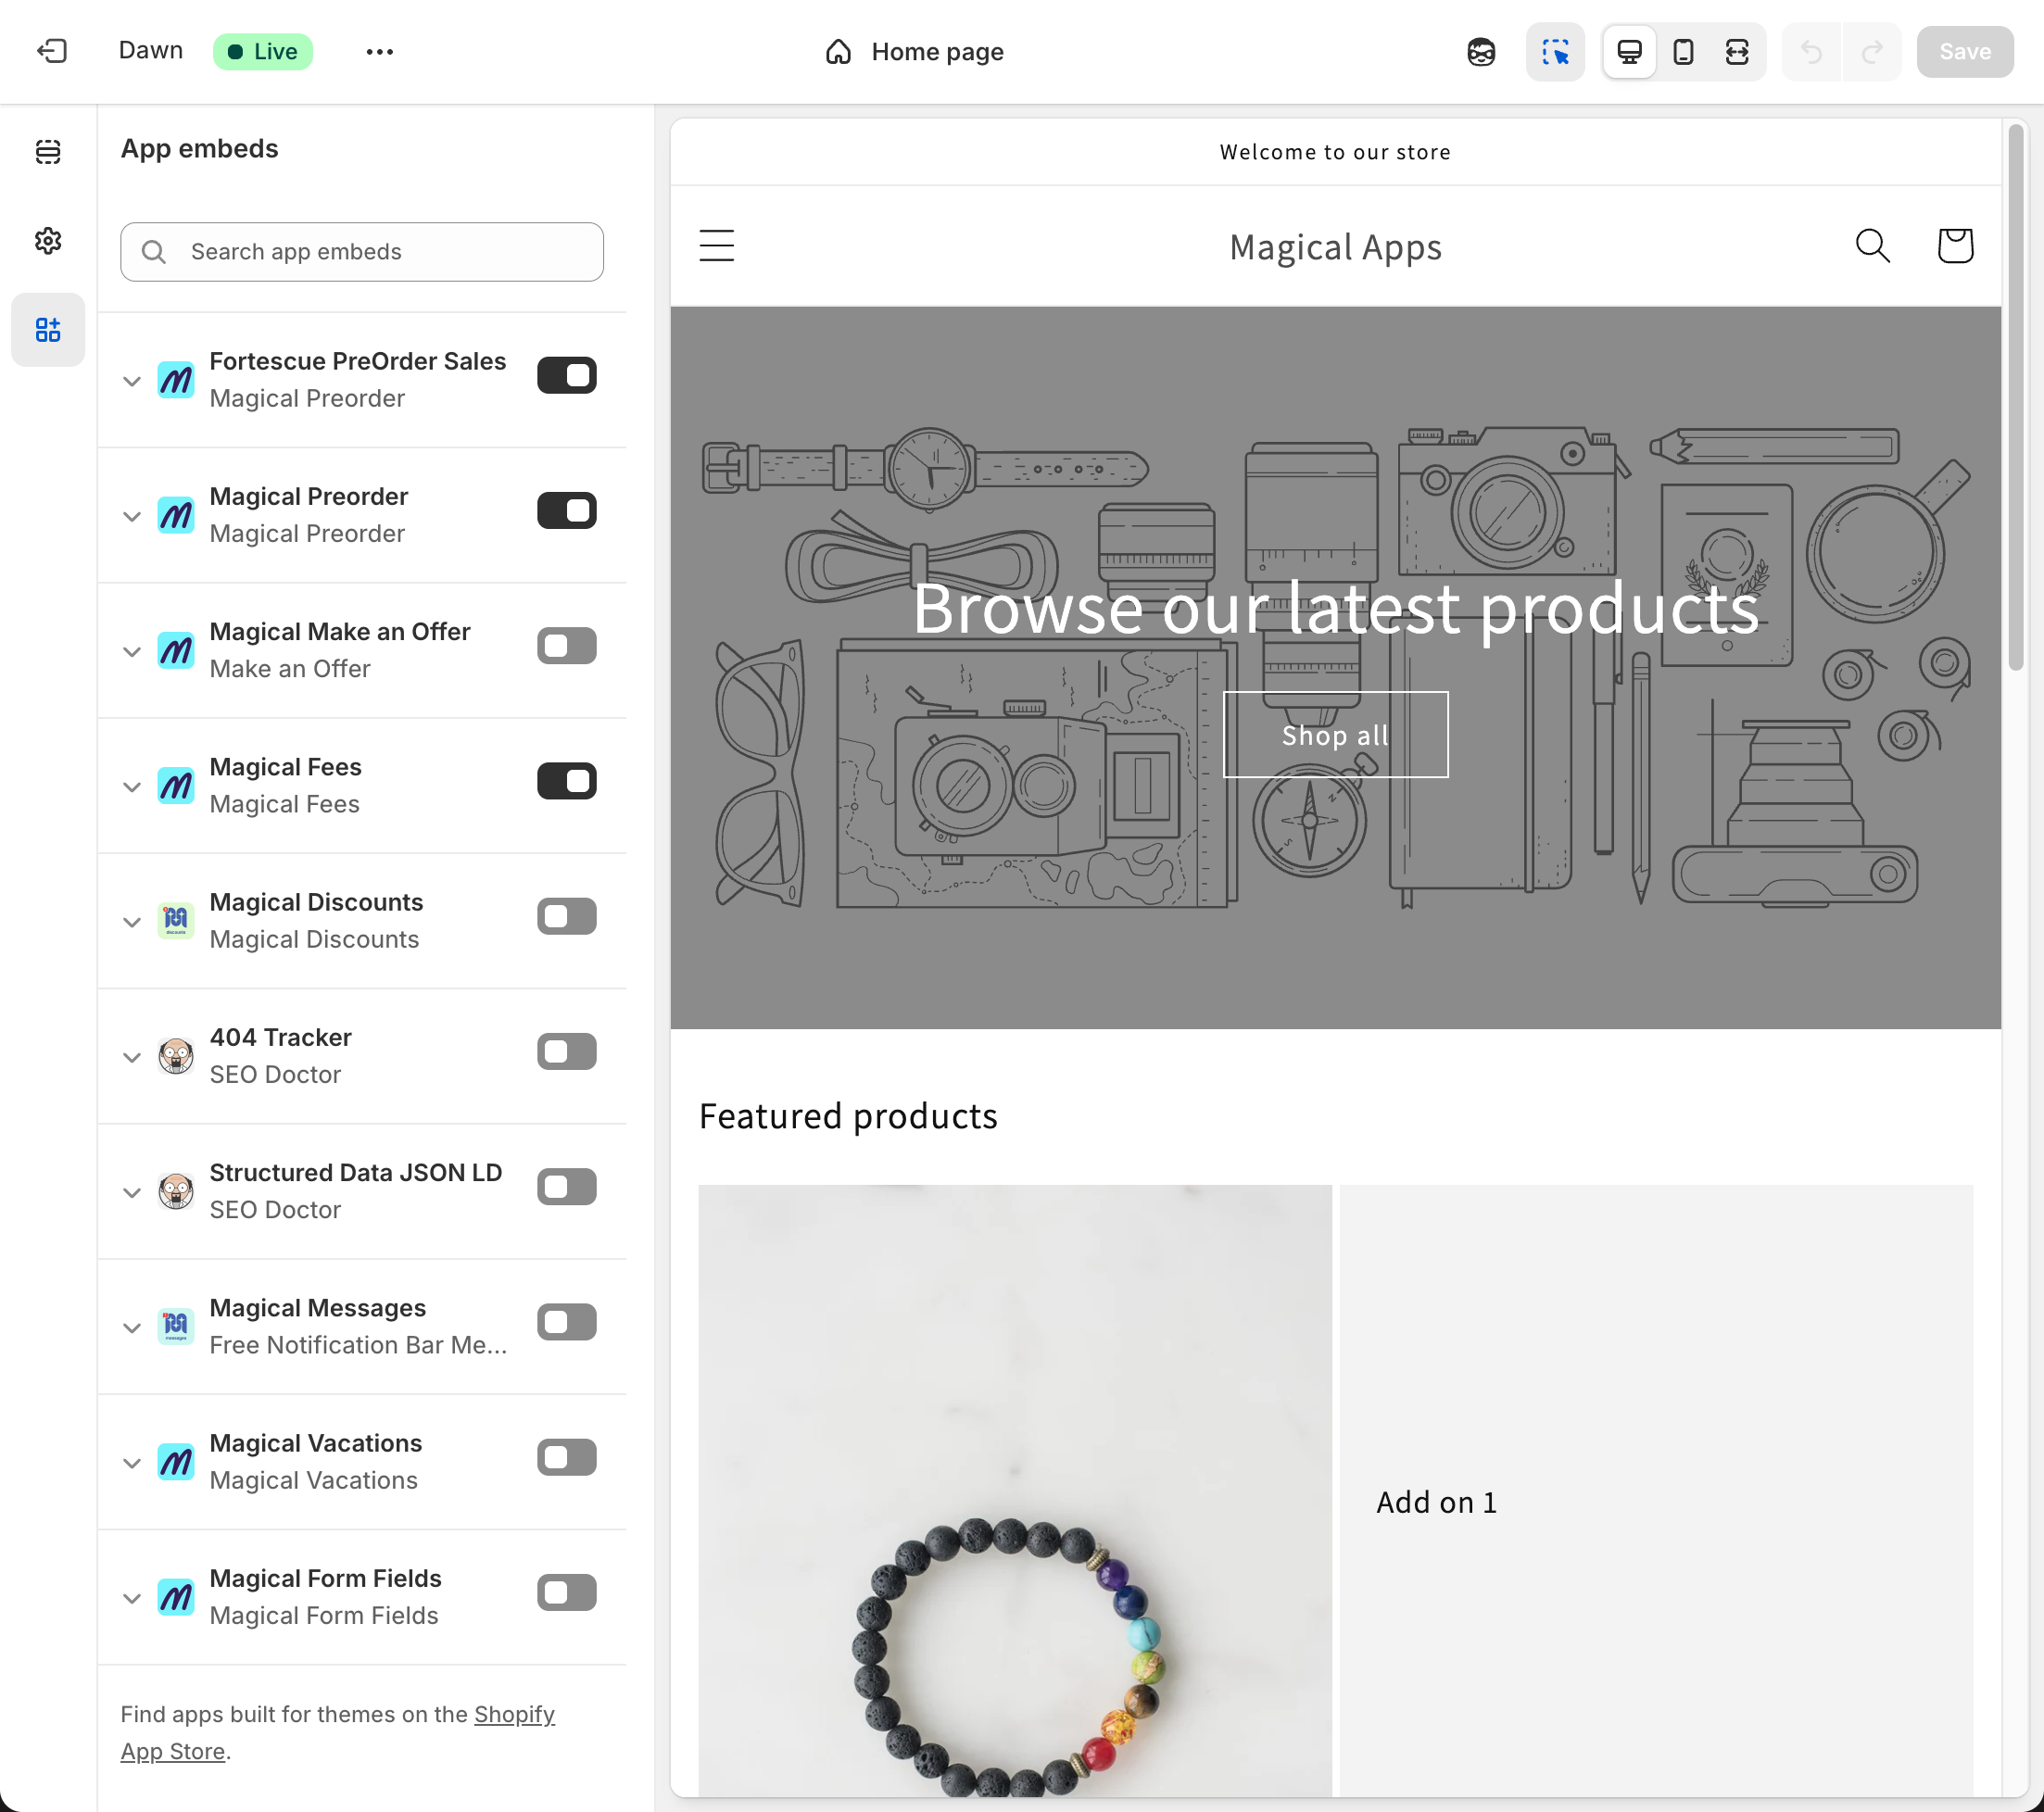
- In the Magical Form Fields app, click Setup in the left sidebar.
- Click Activate app embed block:
- In the theme editor, toggle Magical Form Fields on.
- Click Save.
Step 3: Activate the fields app block
Note: This is a one-time setup. If you've already done it, skip this step.
- From your Shopify admin, go to Online Store > Themes, then click Edit theme next to the theme you want to edit.
- Open the drop-down menu at the top of the page.
- Select Products, then select the product template that you want to edit.
- In the left panel, click Add block or Add section depending on where you want the custom fields to appear.
- In the panel that opens, click Apps, then click Fields to add the block.
- Click Save.
Step 4: Turn on the Checkout UI extension
Note: This is a one-time setup. If you've already done it, skip this step.
- From your Shopify admin, go to Settings > Checkout.
- In Configurations, click Customize next to the checkout you want to edit.
- In the editor, open the Checkout page.
- In the left panel, click Add block under the section where you want the fields to appear.
- Select Magical Fields to place the app block at checkout.
- Click the Magical Fields block in the left panel. Under Checkout behavior, enable Allow app to block checkout.
- Click Save.
That's it — your custom fields are now live on your storefront.
Express checkout bypasses required fields
If you use required product page fields (personalization, terms checkbox, age verification, file upload), consider disabling dynamic checkout buttons (Apple Pay, Shop Pay, Google Pay) on products where those fields are mandatory. Customers using express checkout skip the product page entirely and go straight to checkout — they never see your required fields, so they can complete a purchase without providing the data you need. This is a platform limitation, not an app bug. In Shopify, you can disable dynamic checkout buttons per product or globally in your theme settings to ensure customers always pass through the product page and complete required fields.
Paid fields require published products
Paid fields (embroidery +$X, gift wrapping +$Y, rush fees) create hidden products behind the scenes. These products must be set to "Active" and available on your Online Store sales channel — they can be "Unlisted" so they don't appear in collections or search, but they must be published. If the paid add-on price doesn't show in the cart or the option doesn't work, this is almost always the cause. Check your Shopify admin: Products → find the generated add-on products → ensure Status is Active and the Online Store sales channel is enabled. This is the #1 setup mistake with paid fields.