Quick Answer
Shopify doesn’t provide a native way to add tariff fees as a separate checkout surcharge, but an app can add them for you automatically. An app like Magical Product Fees keeps pricing clear for customers and lets you pass along required import costs without confusing your product prices. Right now, every order sold without a tariff fee takes a bite out of your profit, so adding a tariff surcharge sooner rather than later stops the margin leak.
Watch: How to Add Tariff Surcharges to Shopify (42-second video)
How to Add Tariff Fees Clearly and Transparently on Shopify
Why tariff fees matter for Shopify merchants
Tariffs are unavoidable for many stores. Shopify merchants eventually realize they need to pass them on to customers, but Shopify doesn’t offer a native way to add a tariff fee as its own separate fee. Blending those costs into your product prices can confuse buyers, and not charging them at all will drain your margins on every affected order.
Why Shopify’s native options create pricing and margin risk
The simplest and clearest way to handle this is to show the tariff as a separate surcharge at checkout. This keeps your pricing transparent, helps customers instantly understand what the fee is for, and avoids the confusion that comes from raising product prices without explanation. Shopify can’t do this directly, but an app like Magical Product Fees can add the tariff as a separate, clearly labelled line item on affected orders, with no code or theme changes required.
A simple, transparent way to add tariff surcharges
Every store I’ve helped set up tariff fees has seen the same thing: clear labelling keeps customers confident because they instantly understand the charge. And right now, every order sold without a tariff fee takes a bite out of your profit, so adding the surcharge sooner rather than later stops the margin leak and helps you stay ahead as tariffs continue to evolve.
3 Simple Steps to Add a Tariff Surcharge on Shopify
Step 1: Install the App
Get started with a free trial and install the app on your Shopify store.
Step 2: Create Your Surcharge
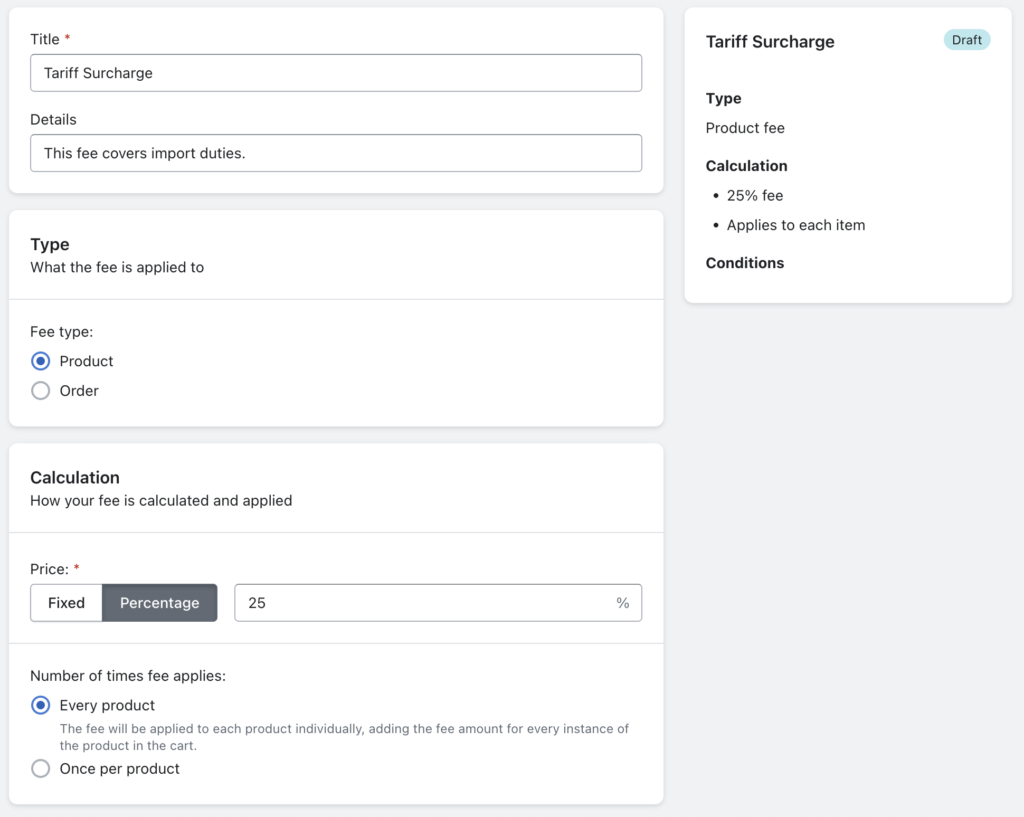
Create a new fee, name it something like Tariff Surcharge, and set your fee as a percentage or fixed amount. For import duties, most merchants set this as a percentage to match the tariff rate being charged on their imported goods.
Step 3: Apply the Fee to Products
Select your fee type (product-based or order-based). For tariffs, we recommend applying it per product.
Supporting Answers
What Are U.S. Tariffs and Why Do They Matter for Shopify Merchants?
As of March 4, 2025, new tariffs on imports to the US from Canada, China, and Mexico have taken effect, adding a 20 to 25% surcharge on many consumer goods. While some exceptions exist, such as electricity and natural gas, these tariffs impact a wide range of products, including electronics, clothing, and produce.
Previously, many low-value shipments were exempt from tariffs under the de minimis rule, which allowed shipments under $800 to enter the U.S. tariff-free. However, this exemption has now ended. For more details, see our article: What the End of the De Minimis Exemption Means for Shopify Merchants.
For Shopify merchants, this means higher costs when importing goods in bulk. If you’re responsible for paying these import fees, you’ll need to decide how to recover the added expense without driving away customers.
One option is to raise product prices, but this often leads to confusion or abandoned carts. And customers may not understand why prices have increased. A better solution is to apply a clearly labeled surcharge at checkout, ensuring customers see exactly why the fee is added while keeping your base prices unchanged.
Can You Add Tariff Surcharges in Shopify?
Shopify does not offer a built in feature for applying tariff surcharges as a separate fee, but that doesn’t mean you’re out of options. Instead, the best way to pass tariff costs onto customers transparently is to use an app like Magical Product Fees.
With Magical Product Fees, you can:
- Automatically apply a tariff surcharge only to affected products.
- Display the surcharge as a separate line item at checkout.
- Ensure pricing transparency without manually adjusting product prices.
Shopify doesn’t support tariff related surcharges directly for all its customers. Some merchants may try workarounds, like increasing product prices across their store, but these solutions can lead to lost sales and customer confusion.
Apps like Magical Product Fees easily and transparently manage these costs, ensuring customers understand exactly why they’re paying more, protecting your sales and customer trust.
Why Use Magical Product Fees?
Adding tariffs as a separate fee instead of rolling them into product prices has multiple benefits:
- Customers see exactly why they are paying more.
- Fees can be adjusted instantly if tariff rates change.
- Apply fees only to specific products or collections.
- No Coding Required. Set up in minutes with a step by step guide and user friendly interface.
Instead of confusing customers with unpredictable price increases, a clear surcharge builds trust while protecting your margins.
Tariffs are frustrating for both you and your customers. As a merchant, you face higher import costs, but passing those costs onto your customers comes with risks. If you hide the fee in your product price, shoppers may feel you’re overcharging. If you spring the fee at checkout without explanation, they may abandon their cart.
How to Display Tariff Fees Clearly to Customers
Once you’ve added tariff surcharges in your Shopify store, the next step is making sure they’re displayed clearly at checkout. A transparent, professional presentation helps customers understand why the charge exists and builds trust.
Here are three ways to display tariff fees more effectively:
1. Show the tariff as a separate line item
Displaying tariffs as a separate line item makes the fee easier to understand and more transparent. Customers can see exactly what they’re paying for, and it reinforces that the charge is legitimate. Shopify doesn’t have a built-in feature for product-specific surcharges, so using an app is the most reliable solution.
2. Label the fee with clear, customer-friendly language
Your choice of wording affects how customers perceive the charge. Use simple, professional language that explains the purpose of the fee. Here are a few examples you can copy and adapt:
- This fee helps offset increased import costs due to new U.S. tariffs.
- A tariff surcharge required on imported goods to comply with current trade regulations.
- This import fee allows us to maintain transparent pricing while complying with trade laws.
Avoid vague terms like “extra charge” or “handling fee,” which can sound arbitrary.
3. Use icons or visual labels to reinforce trust
Adding a small icon next to the fee can make it look official and standardized while reducing the surprise factor. Consider visuals like a customs stamp, balance scale, or a verified checkmark. If you prefer ready-made graphics, sites like UXWing and SVGRepo offer free, minimalist icons you can download and use on your Shopify store.
Here are three free images you can download and use right away. They’re all royalty-free and work great as small visual cues next to your tariff fees.
If you have another icon in mind, you can browse the two sites below:
- UXWing is a large collection of clean, minimalist icons perfect for Shopify tariff product fees.
- SVGRepo has a massive library of icons, and most can be downloaded as PNG files, which are fully supported by Shopify.
Both sites let you download for free with no credit card, subscription, or attribution required.
When choosing an icon, make sure the image is small, non-distracting, and ideally shown next to the label or fee text in your cart or product page.
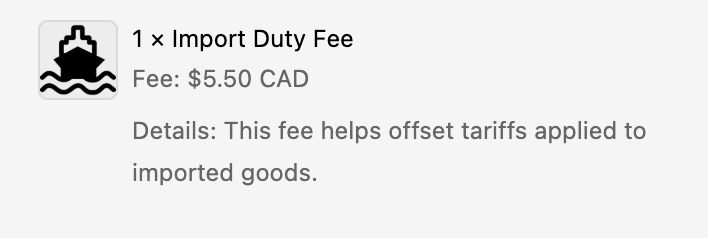
With Magical Product Fees you can easily add an image to the associated fee so it displays at checkout. Below is an example of a store using the app.

Presenting tariff fees this way creates transparency and reduces confusion during checkout. Customers feel informed rather than blindsided, which leads to more completed orders and fewer support questions.
Build Value by Making Tariffs Work for You
Tariffs don’t have to hurt your business. With the right strategy, you can use them to add value and even increase sales. These tactics help offset the frustration customers may feel when they see a surcharge, while reinforcing that your brand is transparent and customer-focused.
1. Bundle Perceived Value with the Tariff Fee
Customers may feel they’re “getting less” when they pay more for the same product. Counter this by adding value alongside the surcharge.
For example:
- “To offset rising tariffs, we’ve added complimentary expedited handling on all orders.”
- “Orders subject to tariffs are prioritized for fastest processing.”
- “You’ll earn double loyalty points on all orders impacted by tariffs.”
You can even reflect this directly in your fee label using Magical Product Fees. For instance: Tariff Surcharge (Includes Expedited Handling). Small touches like this neutralize the impact of the fee and remind customers that they’re still getting value.
2. Offer a Spend Threshold for Tariff-Free Orders
Encourage higher spending by covering the tariff fee on larger orders. For example:
“Orders over $1,500 qualify for free import fees.”
People love thresholds, so free shipping, free returns, and tariff-free orders all increase average order value while keeping things transparent at checkout.
3. Bundle Tariffed and Non-Tariffed Items
If you sell both imported and domestic goods, create bundles that mix tariffed and non-tariffed products. This strengthens perceived value and helps customers focus on the total deal, not the individual surcharge.
“Bundle and save. Get our imported cookware with locally made utensils at a special price.”
By offering value in return for the surcharge, you turn a potential pain point into an opportunity to build trust and loyalty.
How to Create a Tariff Surcharge with Magical Product Fees
Create a new fee, name it something like Tariff Surcharge, and set your fee as a percentage or fixed amount.
For import duties, most merchants set this as a percentage to match the tariff rate being charged on their imported goods.
Select your fee type (product-based or order-based). For tariffs, we recommend applying it per product.

After you create your first fee, your tariff surcharges will be live in your store right away.
You can also read our setup guide for more detailed instructions.
What Merchants Are Saying
Merchants love how easy it is to recover costs with Magical Product Fees. With over 55 five-star reviews, store owners consistently highlight the fast, friendly support they receive when they need it most.
★★★★★
Paint With Diamonds, United States
“Super responsive and helpful support. Very useful app when it comes to being transparent about tariffs.”
★★★★★
Creating Perfume, United States
“Such an amazing app. Was looking for months how to add extra fee to the products. The support is also amazing. They helped me with the needed information. GREAT!”
Merchants trust Magical Product Fees to help them recover costs quickly and keep their margins healthy.
Try Magical Product Fees Free Today.
Frequently Asked Questions about Magical Product Fees
I’ve personally helped hundreds of Shopify stores with their onboarding. Here are the top 3 questions our team gets from merchants setting up tariff surcharges:
Can I set different surcharge rates for different products?
Absolutely. You can create multiple fees and apply them to specific products or collections. Each fee can have its own custom rate, giving you full control over how tariffs are applied across your store.
Will the surcharge show as a separate line item?
Yes! Magical Product Fees displays your surcharge as a separate line item at checkout. This is a major advantage over Shopify’s native setup (which doesn’t support this feature) and it helps keep your pricing transparent for customers.
Can I apply the surcharge only for certain countries?
Yes, it’s possible to apply fees based on the customer’s location. You can apply fees based on the customer’s country, state, or province.
Stop losing margins to tariffs. Set up Magical Product Fees in minutes.
Personal Experience
I just helped a California based electronics store set up a fee on Shopify that charges a 25% import fee on electronics from Canada. They required a little bit of help with the setup, but in just a couple of emails we were able to get the fee up and running for them in about 15 minutes.
-Kyle Godon, Shopify App Expert
This highlights the value of having real human support when using an app like Magical Product Fees.
Key Takeaway
Tariffs can significantly cut into your profit margins, but raising prices isn’t always the best solution. By using Magical Product Fees, Shopify merchants can automatically apply clearly labeled tariff surcharges that maintain transparency, protect margins, and build trust with customers.
Magical Fees
The Magical Fees app is a fast and easy way to build, customize, and attach fees to products or entire orders.


